Scheduling an email can be very time saving and helpful for most of the users that require this feature for their email clients. Google added the new email schedule feature for the Gmail in April 2019. Before this, a user had to use some third-party extension/add-on to schedule the emails. However, now in Gmail, it is pretty easy to schedule an email on the time and date that the user wants to. In this article, we will teach you about how you can schedule an email in Gmail.

How to Schedule an Email on Desktop
This is for the users that use Gmail on the desktop to send and receive emails. Any browser will work for this method because the feature exists in the Gmail client and not in the browser. Gmail now has a small arrow icon in the send button which can lead to the Schedule send option for the email that the user is writing. Follow the below steps to try it out:
- Open your web browser and go to the Gmail page. Log in to your Gmail account by providing the username and password.
- Click on the Compose email button on the left side to start writing a new email.

Composing a new email - Fill all of the fields and complete whatever you are writing or attaching to your email. Now click on the arrow icon in the Send button and select Schedule send option.

Selecting the schedule email option - It will provide the basic scheduled time and the custom date & time that you can pick for the email to send.
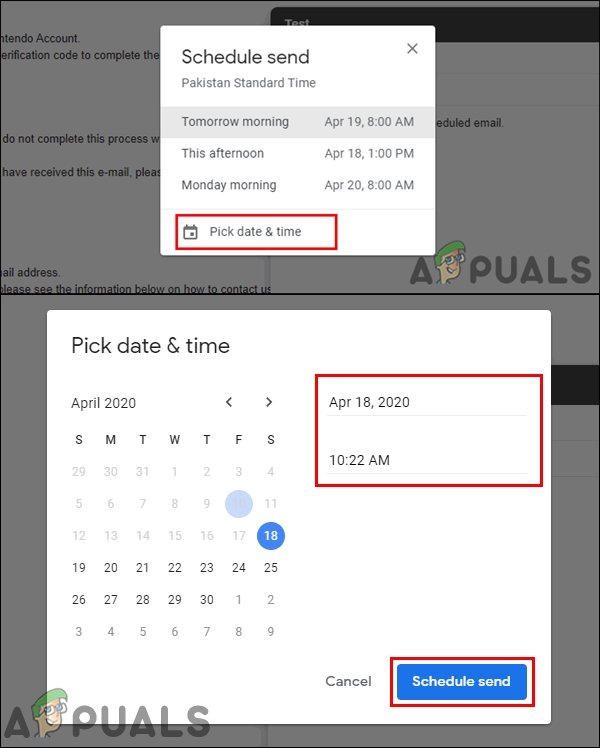
Selecting the date and time for email - Once you have scheduled the email, it can be found in the Scheduled section.

Schedule section - To cancel the email, you can either just delete the email in the Scheduled section or you can open the email and click on the Cancel send option.

Canceling the scheduled email
How to Schedule an Email on Android/iPhone
This is similar to the desktop method; however, the interface and the options will be a little different. Most of the users may not have access to their PC all the time. So, they might need to use this feature on their phone’s Gmail application. Make sure you have the latest version of the Gmail application installed on your phone. Follow the below steps to try scheduled email on your phone:
- Open your Gmail application on the phone and tap on the plus “+” icon to start a new email.

Opening Gmail application and composing a new email - Now type the recipient’s email address, subject, and the email that you want to send. Once you are done, tap on the menu (three dots) icon at the top right corner.
- Select the Schedule send option on the list.
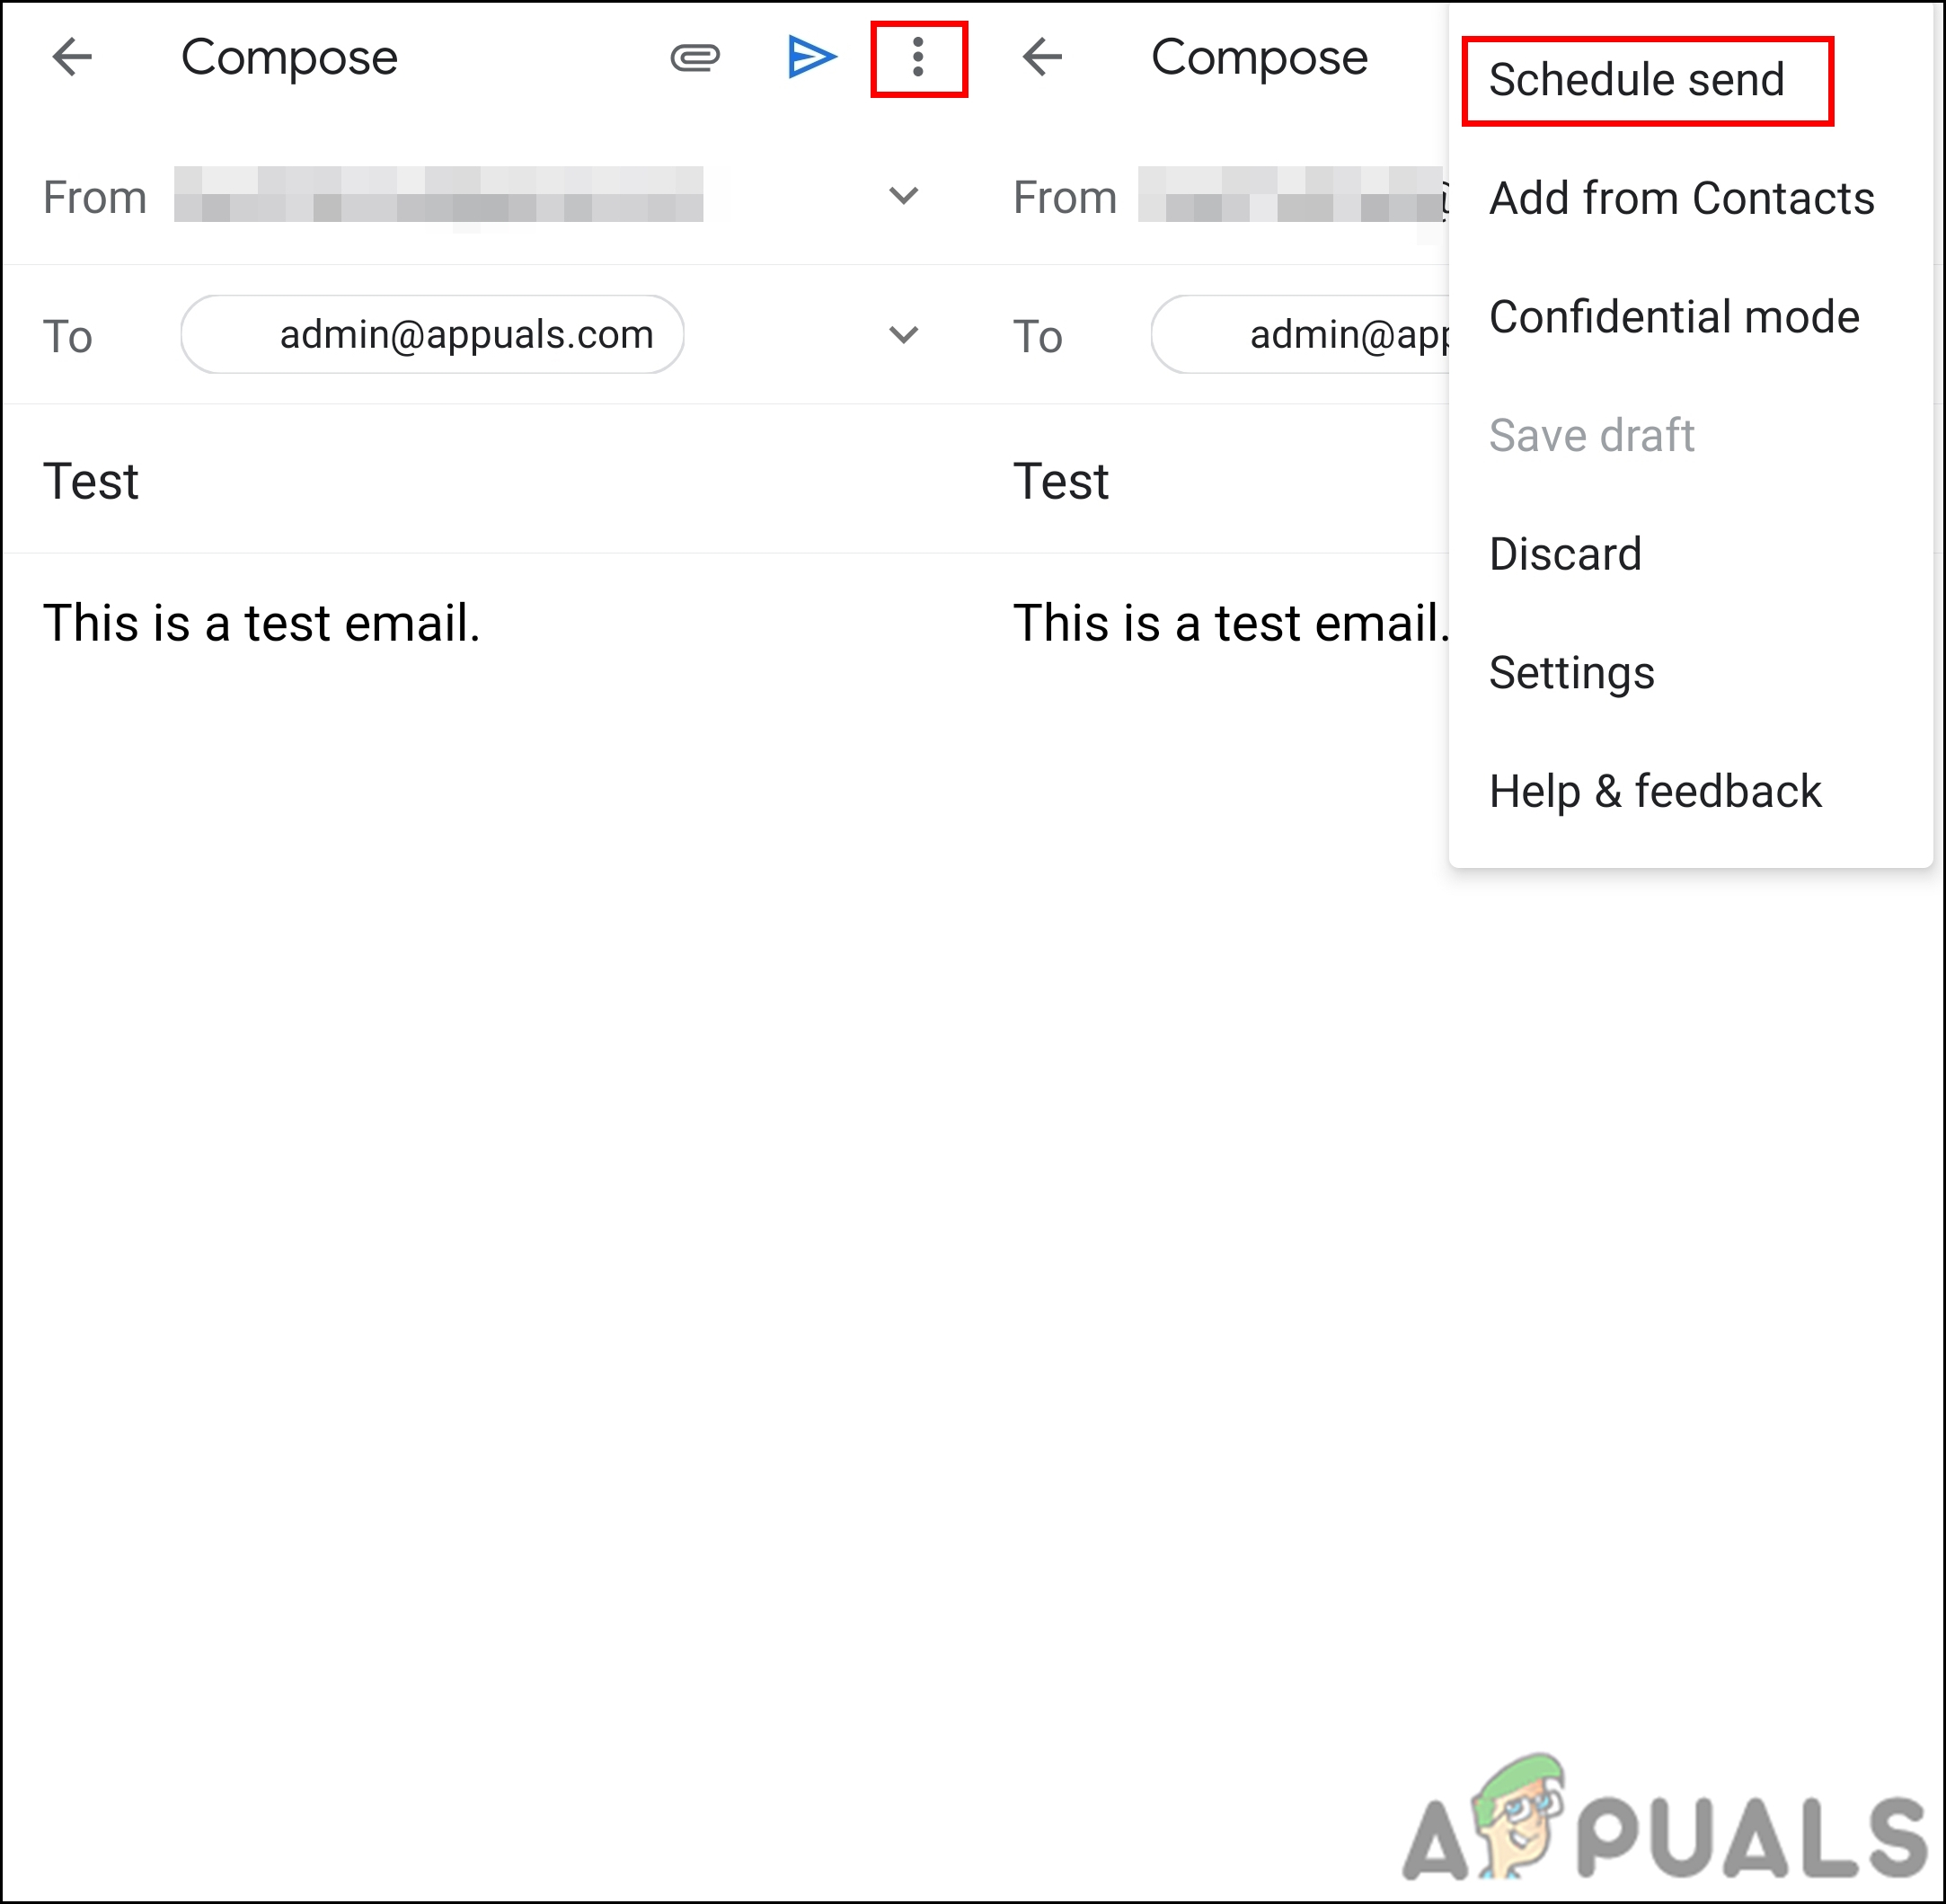
Selecting the schedule send option - This will show you the last scheduled time you used or some other options. You can also tap on Pick date & time to add a custom schedule time for the email.

Setting the date and time for email - This will schedule the email for the time you set. You can find the scheduled email in the Scheduled section under the Sent section. To cancel the scheduled email, just open it and tap on the Cancel send option.