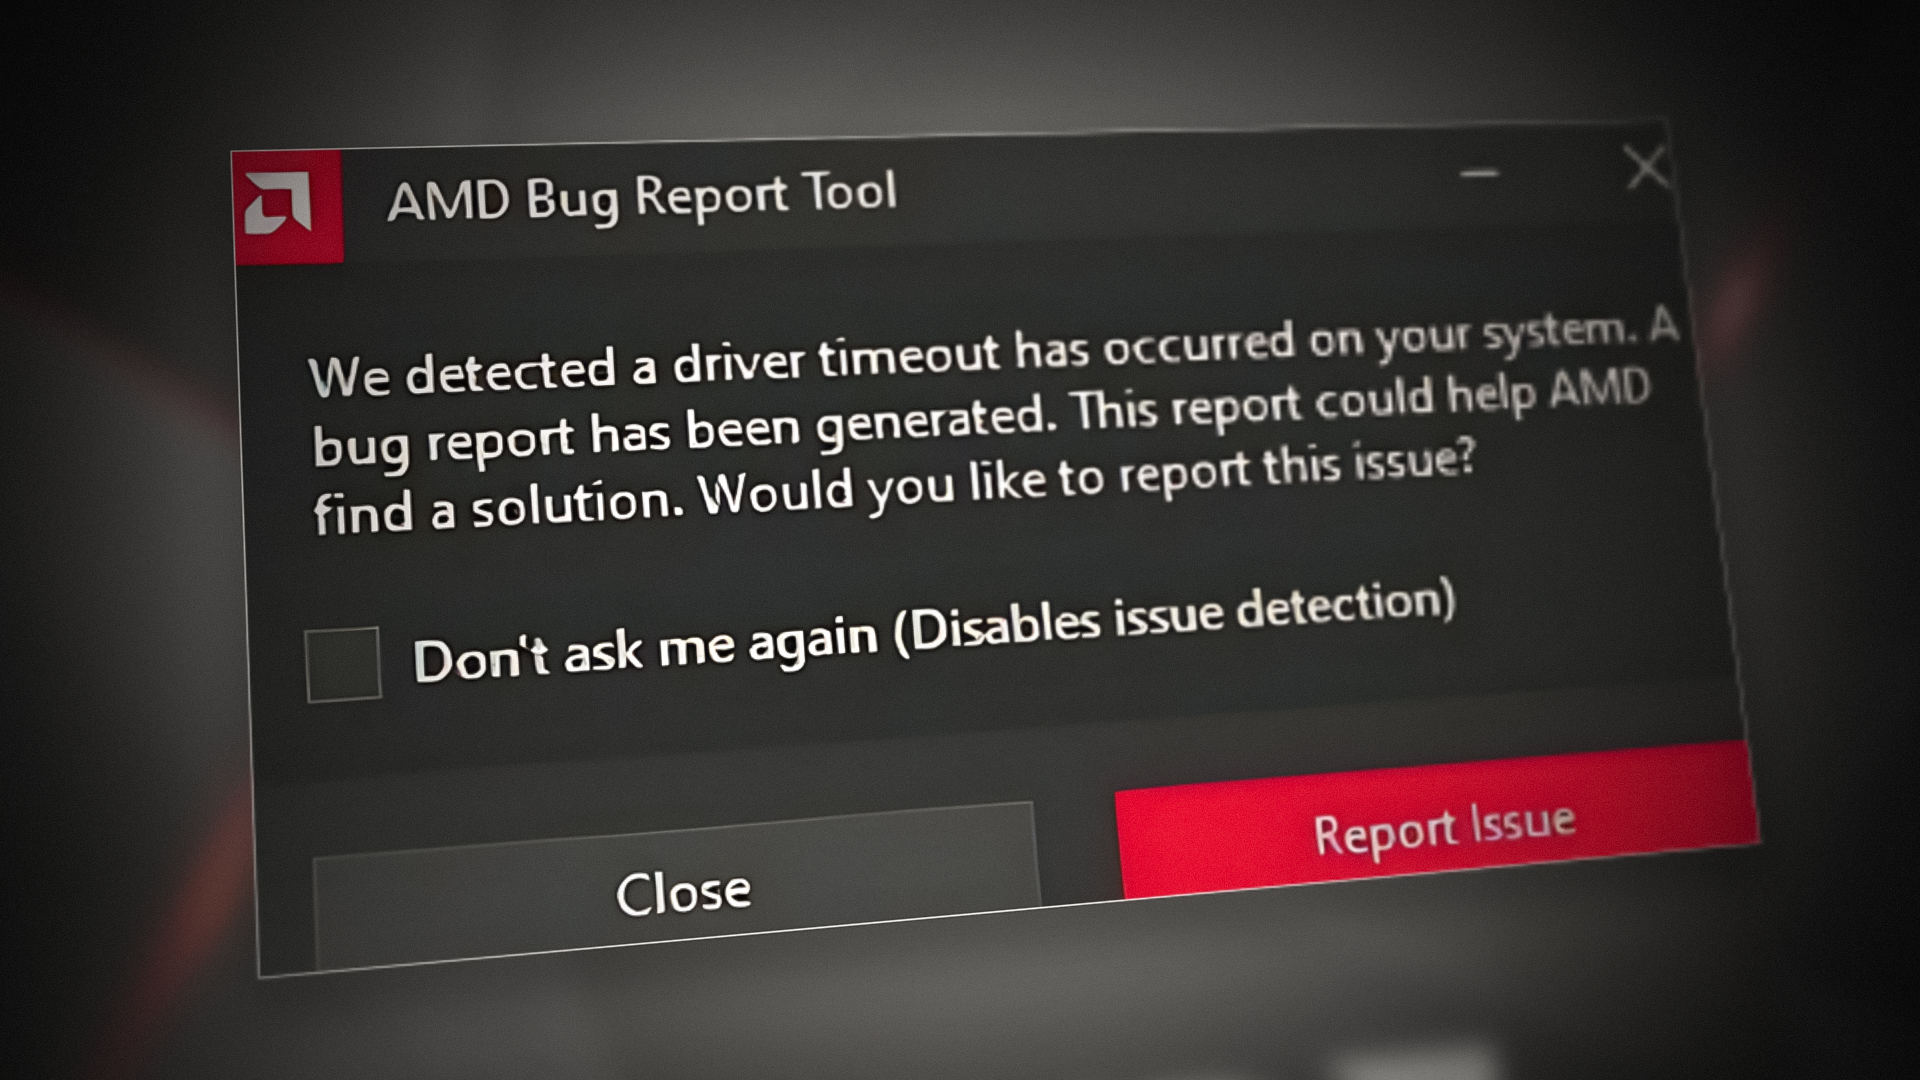
One of the most common errors an AMD user may have to face with an AMD card is the driver timeout message box. This issue is reported nearly on all types of AMD cards with different games and programs. For some users, the game or program crashes (with or without a black screen) to the desktop with the error message but for others, they have to force restart the system. Usually, the following type of message is shown:
The AMD display drivers may keep crashing with the timeout issue due to numerous factors, but the following are found to be the main responsible for the issue:
- Outdated OS of the System: If the OS of your system is outdated, it may become incompatible with the latest AMD driver, causing the timeout issue.
- Less Size of Virtual Memory of the System: If the virtual memory of your system is not of enough size, the AMD driver may fail to properly load.
- Outdated, Corrupt, or Incompatible Driver: If the AMD driver itself is outdated, corrupt, or incompatible with the system, it may result in the timeout issue under discussion.
- Improper Configuration of the Radeon Settings: There can be various improper Radeon configurations of the AMD Radeon software settings due to which the AMD driver may take a longer time to load, and thus the timeout issue. These settings may consist of the Shaders Cache, FreeSync, etc.
Update the OS of Your System to the Latest Build
If the OS of your system is outdated, it may become incompatible with the AMD driver and cause the driver timeout issue. Here, you can fix AMD driver timeout by updating the OS of your system to the latest build.
- Press the Windows key, search and open the System Settings of Check for Updates.
- Now, in the resulting update window, click on the Check for Updates button, and if updates are available, download and install these updates. Make sure to install Additional Updates as well.
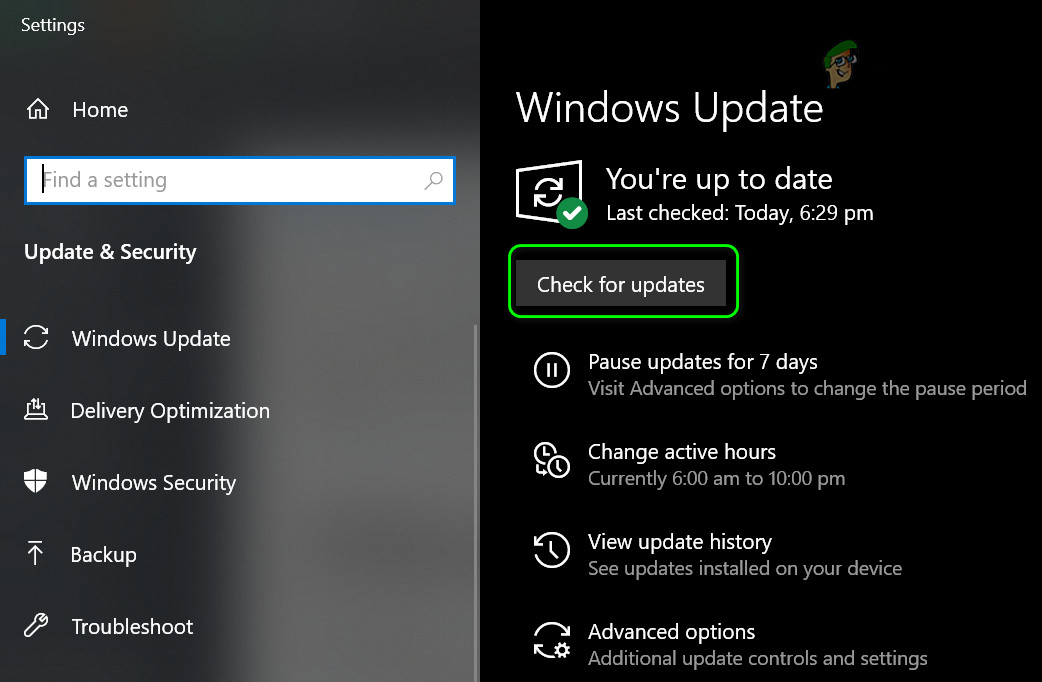
Check for Windows Updates - Then reboot your system and upon reboot, check if the AMD Timeout issue is resolved.
- If updating Windows did not work, check if performing SFC, DISM, and ChkDsk scans on the system clear out the issue.
If that did not work, check if performing a thorough cleaning of the system/GPU solves the problem. Also, make sure all the RAM sticks are properly seated.
Set Your PC to the Best Performance Mode
If your PC is set to use battery-saving mode, then it may fail to load the modules essential for the operation of the AMD driver in time, resulting in a timeout of the AMD driver. In this case, setting the PC to the best performance mode may solve the problem.
Set Power Mode to Best Performance
- Click on the Battery icon in the system’s tray and move the Power Mode slider to the right end to set the mode to the Best Performance.
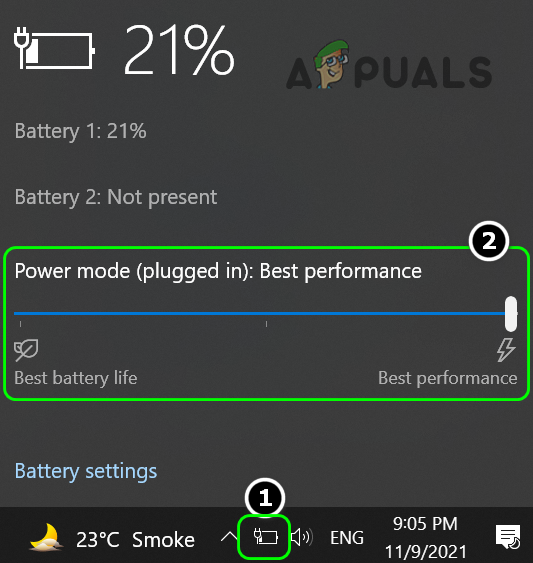
Set Power Mode to the Best Performance - Now check if the AMD driver timeout issue is resolved.
Adjust Visual Effects to Best Performance
- If you are not using a laptop or above setting did not work, click Windows, type, and open View Advanced System Settings.

Open Advanced System Settings - Now open Performance Settings and head to the Visual Effects tab.
- Then set the system to Adjust for Best Performance.

Enable ‘Adjust For Best Performance’ in the Advanced System Settings - Now apply your changes and restart your PC.
- Upon restart, check if the driver timeout issue is resolved.
Set the PC’s Power Plan to the Best Performance
- Right-click Windows and select Power Options.
- Now, under Related Settings, open Additional Power Settings and Create a New Power Plan.
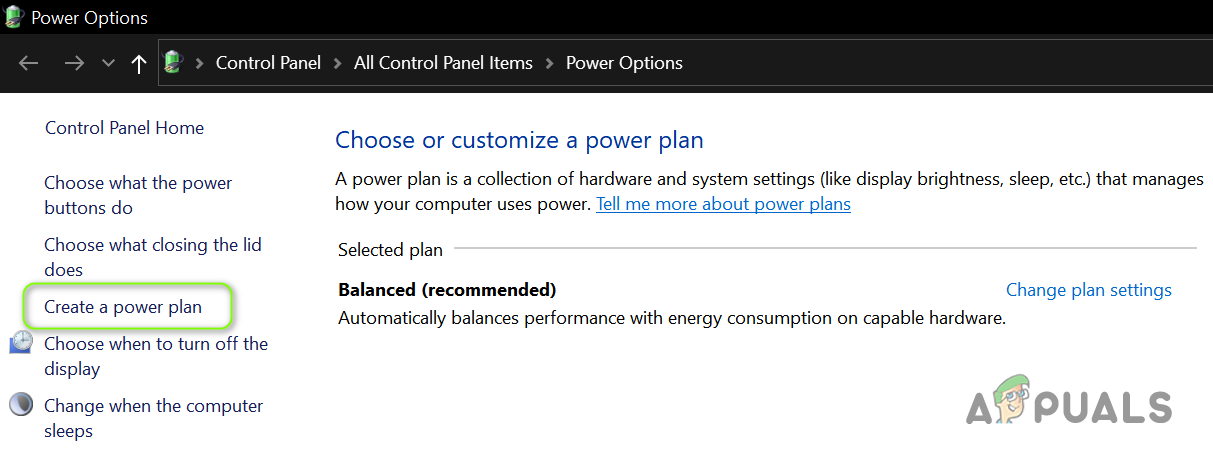
Create a Power Plan - Then select High Performance and click on Next.
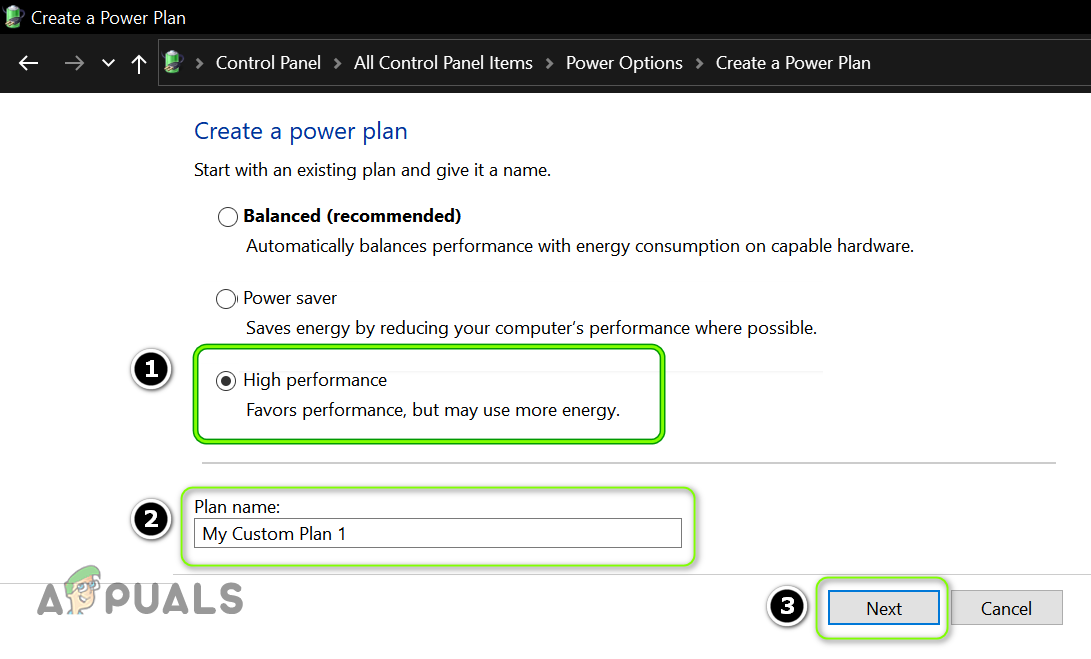
Create a New High-Performance Power Plan - Now click Create and reboot your PC.
- Upon reboot, check if the AMD driver issue is resolved.
Increase the Virtual Memory of Your System
Virtual Memory is part of your hard disk that is used by the system as RAM in some cases. If the virtual memory of your system is too low, the system may fail to load the AMD driver, resulting in the AMD driver issue. In this context, increasing the virtual memory of your system may solve the problem. Before proceeding, make sure to create enough space on the drives (either using Disk Cleanup or removing Temporary files) for the virtual memory.
- Click Windows, type, and open View Advanced System Settings.
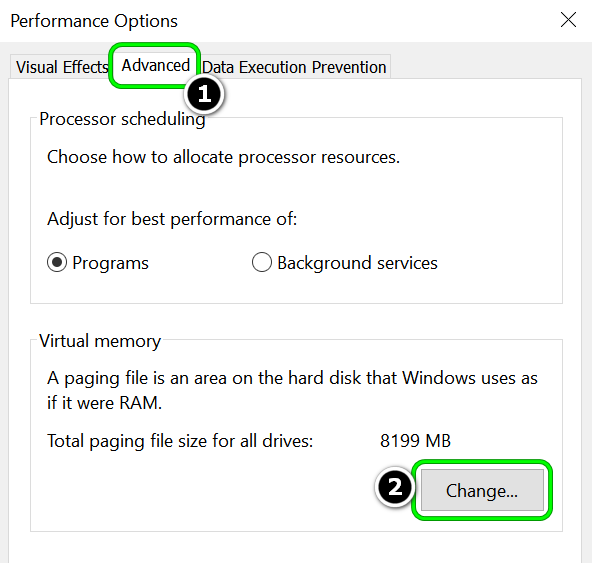
- Now open Performance Settings and head to the Advanced tab.
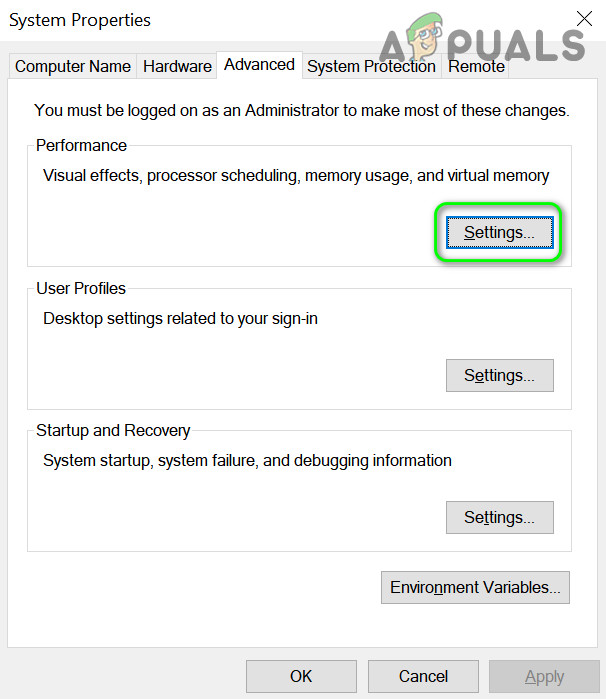
Open Performance Settings in Advanced System Settings - Then, in the section of Virtual Memory, click on the Change button.
Click on Change in Virtual Memory Section - Now uncheck the Automatically Manage Paging File Size checkbox for All Drives and select the system drive (in the Drive section).
- Then select Custom Size and in the Initial Size box, enter the Recommended value from the Total Paging File section e.g., 1908 MB.
- Now, in the Maximum Size box, enter the Currently Allocated Value from the Total Paging File section e.g., 6144 MB.
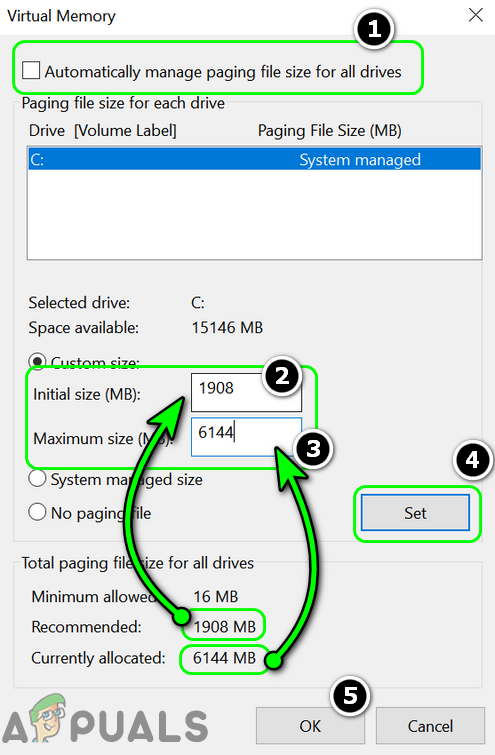
Set Custom Size of Virtual Memory of Your System - Then click on the Set button and apply your changes.
- Afterward, when asked to, click on Restart and upon restart, check if the AMD driver timeout issue is resolved.
Decrease the Refresh Rate of Your Display
The AMD driver may show the timeout issue if the refresh rate of your display is not compatible with the driver and lowering the refresh rate of your display may solve the problem.
- Right-click on your desktop and select Display Settings.

Open Display Settings - Now open Advanced Display Settings and click on Display Adapter Properties.
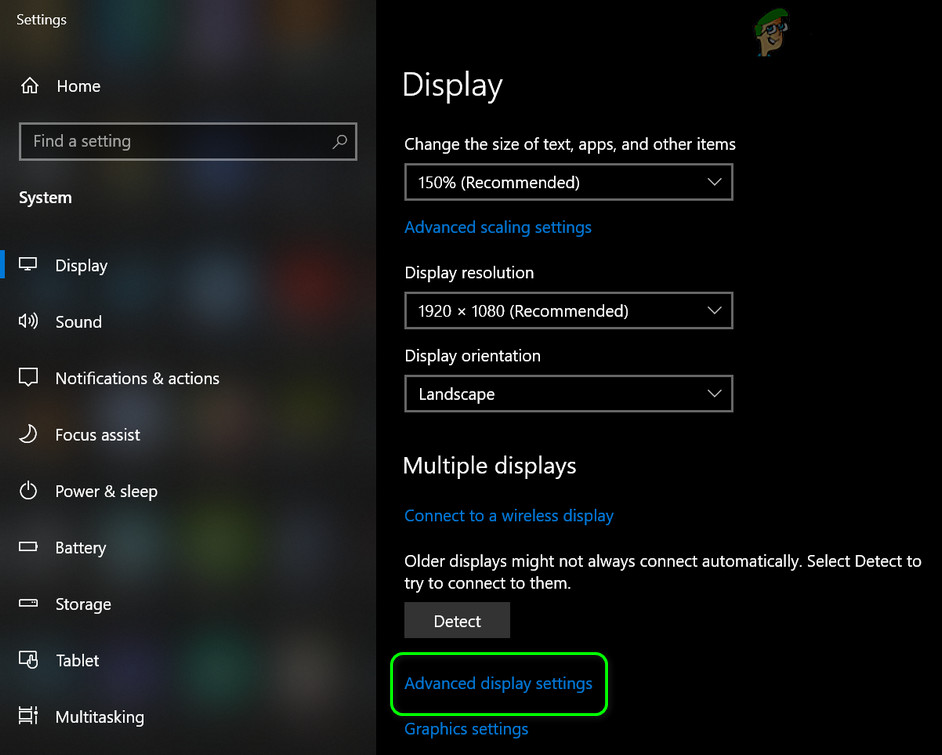
Open Advanced Display Settings - Then select the display and expand the Refresh Rate dropdown.
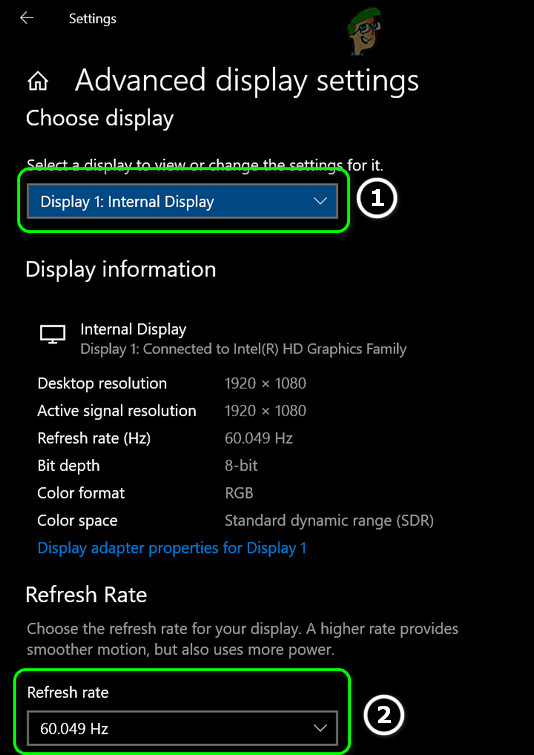
Set the Refresh Rate in the Windows Settings - Now select the lowest refresh rate possible e.g., 129 Hz or 100 Hz (in case of 144 Hz display), and apply your changes.
- Then restart your system and upon restart, check if the system is clear of the AMD drive timeout issue.
- If that did not work, then check if disabling/enabling the AMD graphics card in the Device Manager solves the problem.
Disable the Fast Startup of the System
By default, the Windows OS is configured to boot using the Fast Startup, which puts your system into a mixed state of sleep and hibernation. Although, this feature is quite helpful, sometimes, it may overlook a resource essential for the operation of the AMD driver causing the timeout issue at hand. In this context, disabling the Fast Startup of your system may solve the AMD timeout problem.
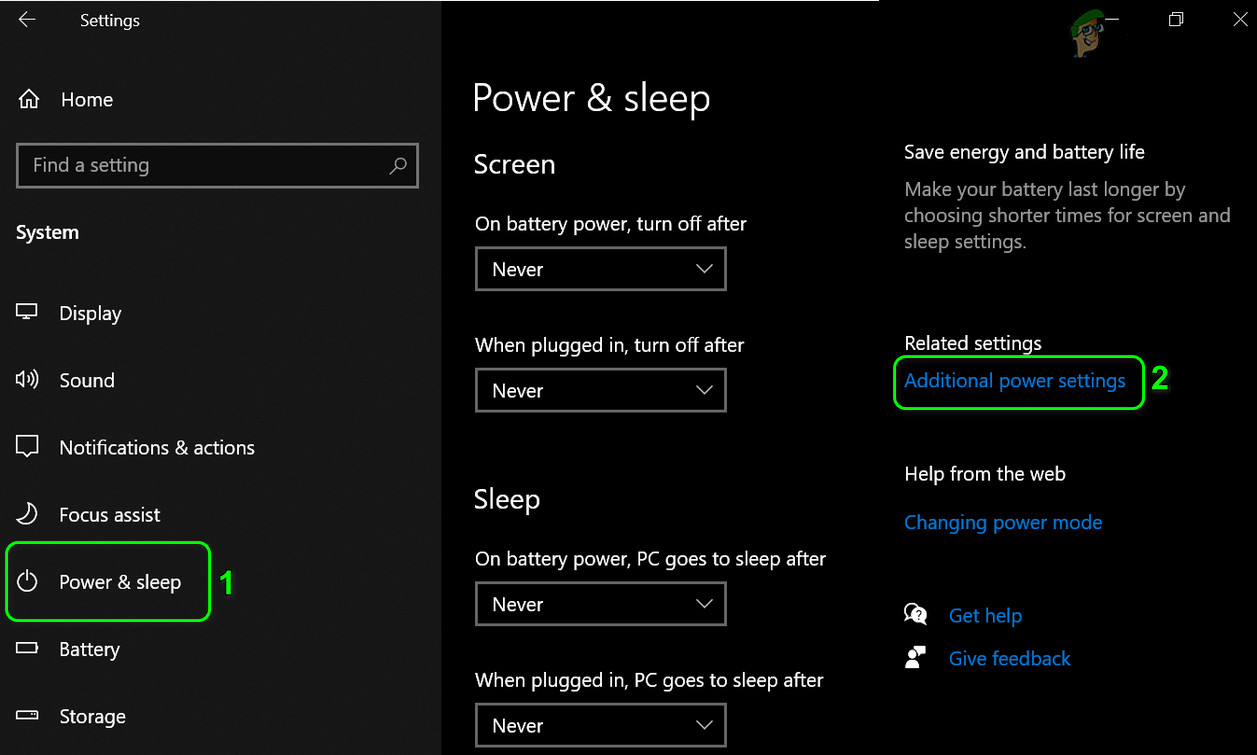
- Right-click Windows and select Power Options.
- Now, in the right pane, click on Additional Power Settings, and in the left pane, select Choose What the Power Buttons Do.
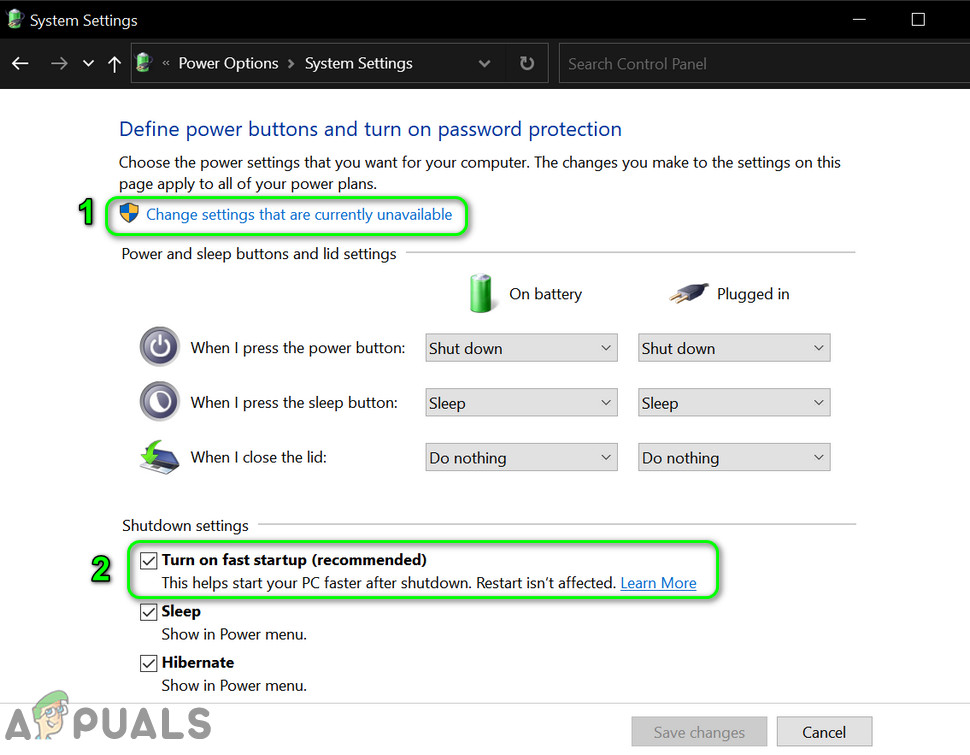
Open Additional Power Settings - Then click on Change Settings That Are Currently Unavailable.
- Now, uncheck the checkbox of Turn on Fast Startup and click on the Save Changes button.
Disable Fast Startup - Then restart your system and upon restart, check if the AMD driver is clear of the timeout error.
If the issue persists, then check if performing a clean boot of the system clears out the issue. The Azure TTS, AMD Ryzon, and MSI Afterburner are reported by users to cause the issue.
Disable Issue Reporting of the AMD Driver
If you are only bothered by the AMD driver timeout dialogue box but the system is working fine, then disabling the issue-reporting in AMD Adrenaline software may solve the problem.
- Launch the AMD Adrenaline software and click on the Settings icon.
- Now toggle the switch of Issue Reporting to the off position and restart your system.
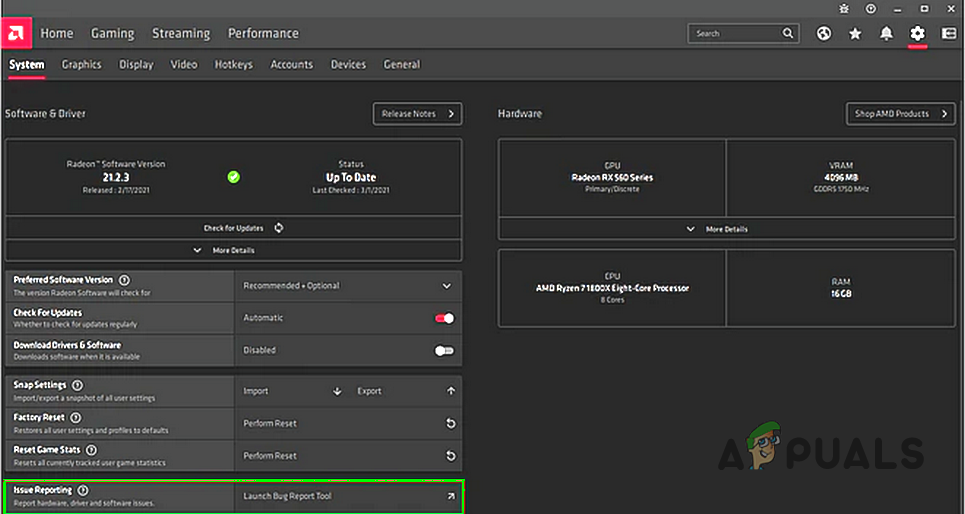
Disable Issue Reporting of AMD - Upon restart, check if the AMD Driver Timeout dialogue is not shown.
Update, Reinstall or Try an Older AMD Driver
If the AMD driver is outdated, corrupt, or incompatible with the system, then it may throw the timeout error. In such a case, updating, reinstalling, or trying an older AMD driver may solve the problem.
Update AMD Driver
- Right-click on your desktop and select AMD Radeon Settings.
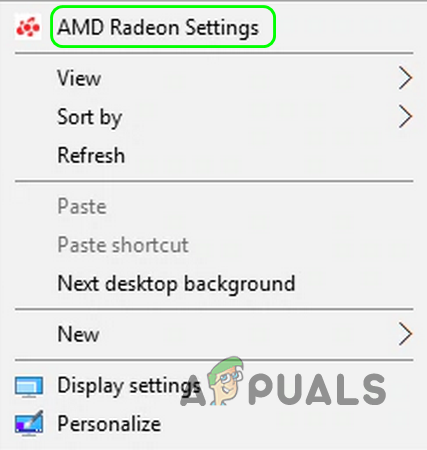
Open AMD Radeon Settings - Now open Updates (near the left bottom of the window) and click on Check for Updates.
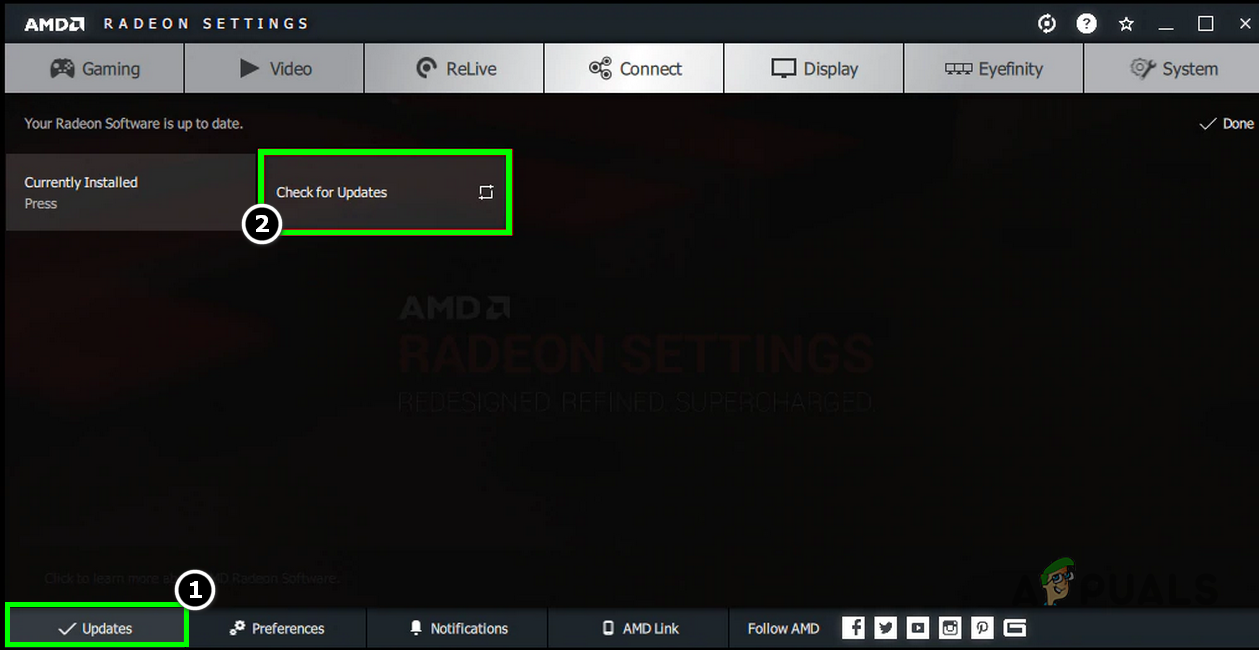
Check for AMD Drivers Updates - Then if an AMD updated driver is available, download and install the update.
- Once updated, restart your system, and upon restart, check if the AMD timeout issue is cleared.
- If not, then check if downloading and running the offline installer of the newest drivers (without uninstalling the previous version) clears out the issue.
Reinstall the AMD Driver
From this point on, whenever you have to restart your PC after uninstalling the driver, firstly make sure to disable Windows Update, antivirus, and LAN/Wi-Fi connections of your system, till the reinstallation.
- Now, download the latest AMD drivers from the AMD websites.
- Then, download the AMD Cleanup Utility from the following URL or you can use DDU:
https://www.amd.com/en/support/kb/faq/gpu-601
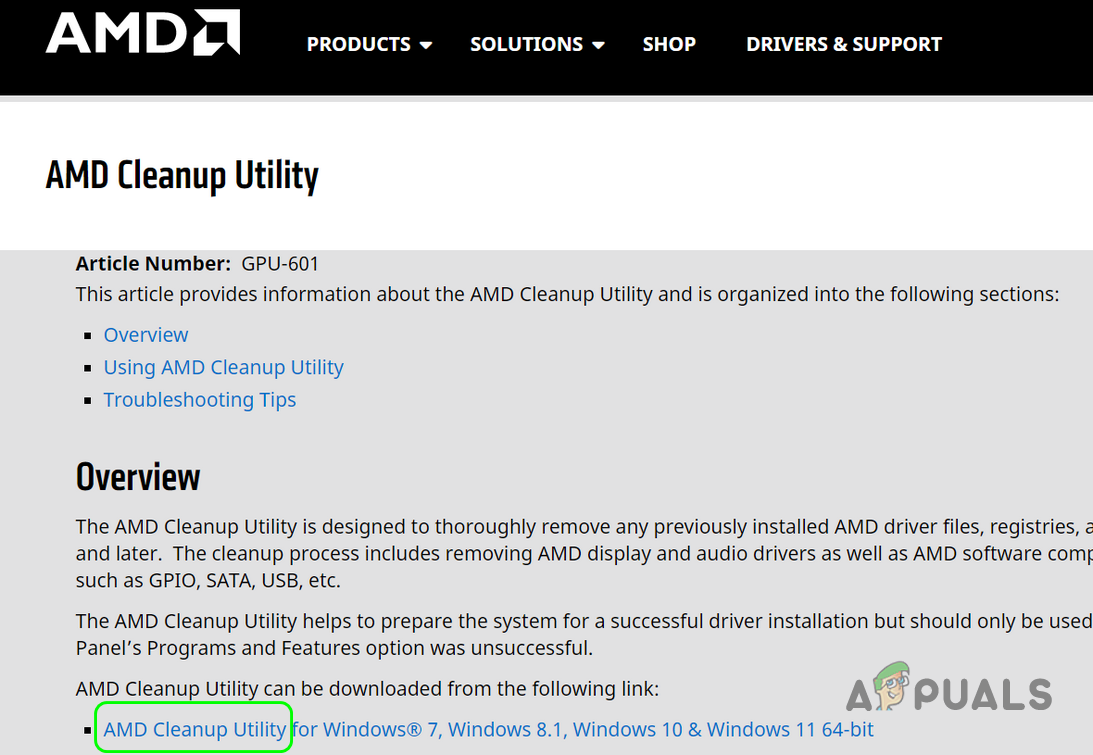
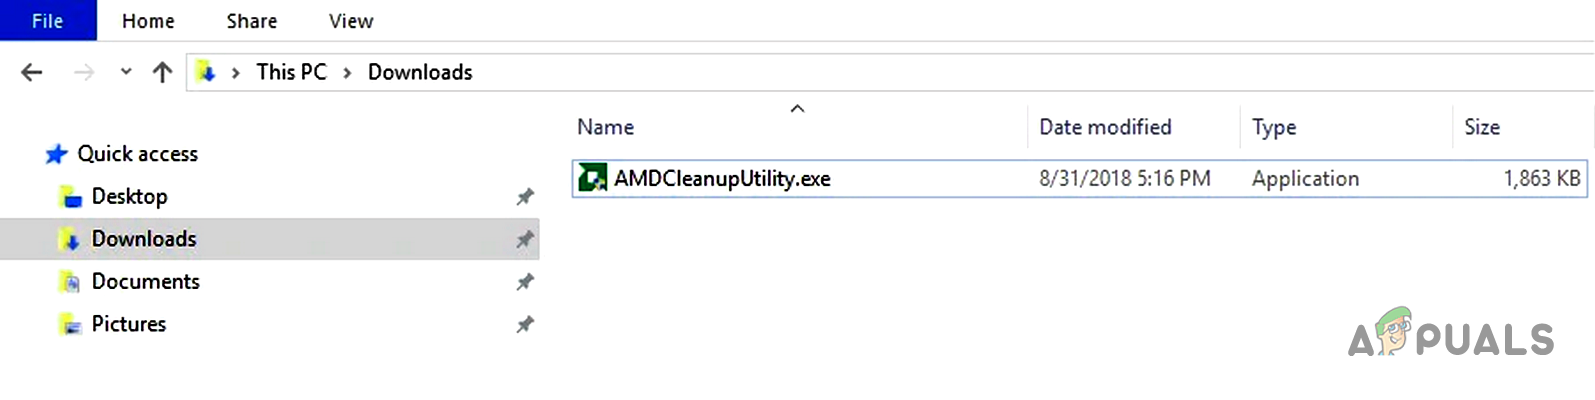
Download AMD Cleanup Utility - Once downloaded, double-click on AMDCleanupUtility.exe.
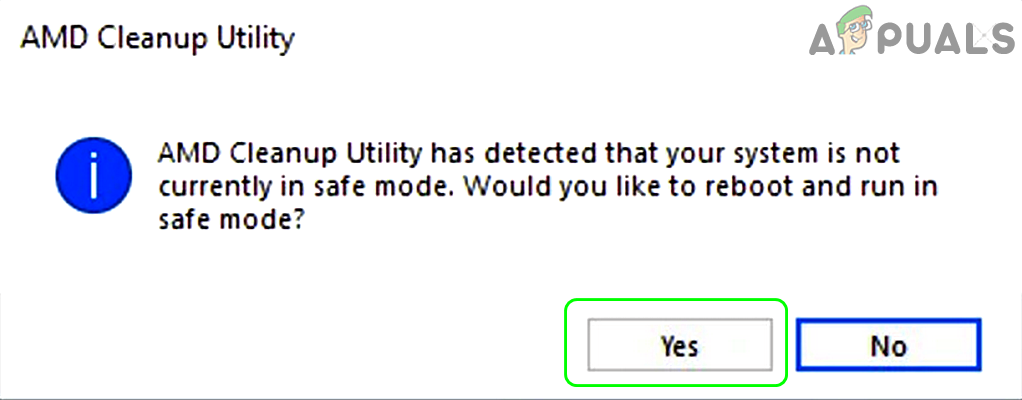
Launch the AMD Clean Up Utility - Now click on Yes to reboot your system in Safe Mode and then confirm to reboot your system.
Confirm the AMD Cleanup Utility to Launch Your System in Safe Mode - Then wait till the AMD drivers, applications, and utilities are removed. The screen may flicker during the process.
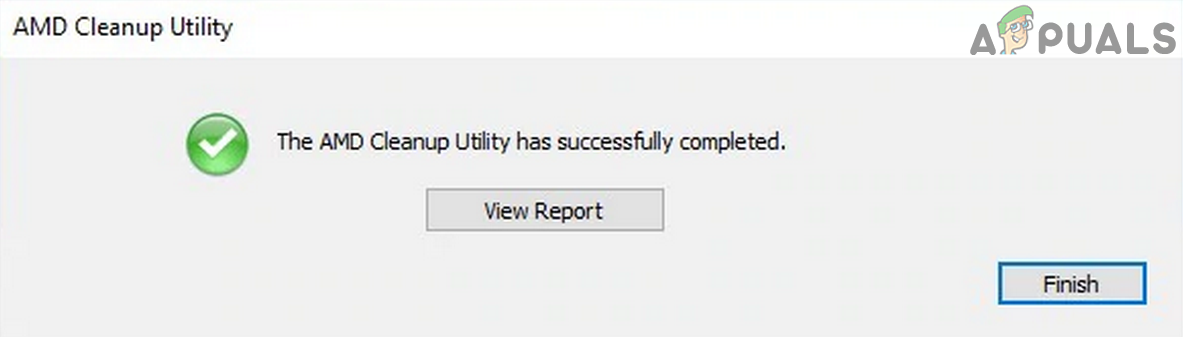
Wait till the AMD Cleanup Utility Removes Drivers, Applications, and Utilities - Once the cleanup process is complete, click on Finish in the AMD Cleanup Utility dialogue box and click on Yes to reboot your computer.
Click Finish When AMD Cleanup Utility Completes - Once the system reboots, wait for at least 3 minutes (do not launch any thing) and reboot your PC again.
- Upon reboot, install the AMD drivers and use the defaults settings during the installation process.
- Then reboot your PC and upon reboot, enable LAN/Wi-Fi.
- Now open ADRENALINE and don’t change any settings.
- Then reboot your PC and upon reboot, enable Windows Update and check if the driver timeout issue is resolved.
- If that did not do the trick, then uninstall the drivers as discussed above and restart your PC.
- Upon restart, reinstall the driver but at the install screen, checkmark the Factory Reset checkbox and complete the installation.
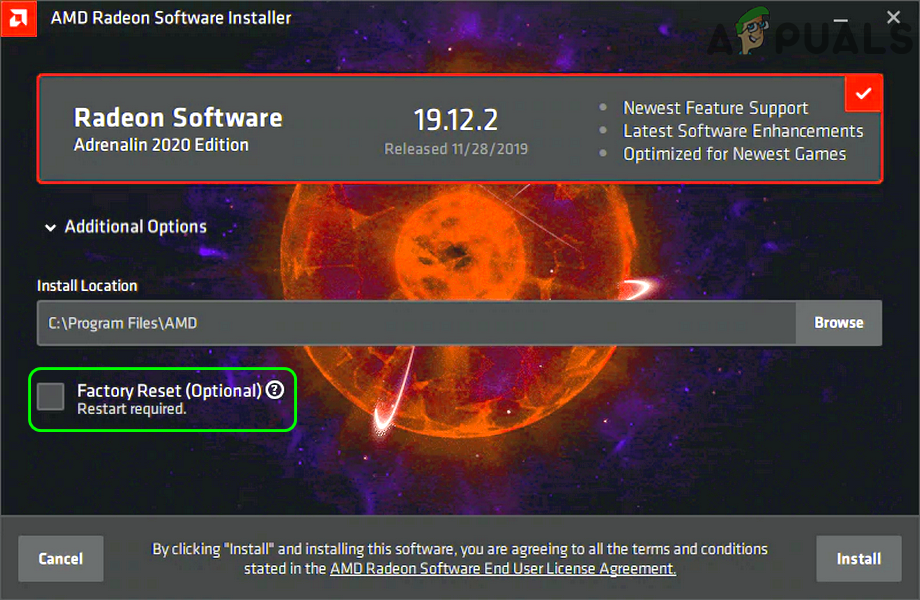
Select Factory Reset When Installing AMD Driver - Afterward, reboot your PC and upon reboot, check if the system is clear of the driver timeout issue.
Install an Older Version of the AMD Drivers
If the latest drivers are not compatible with your system, then using an older version of the drivers may solve the problem.
- Uninstall the AMD driver as discussed previously and navigate to the following URL:
https://www.amd.com/en/support
- Now select your product and click Submit.
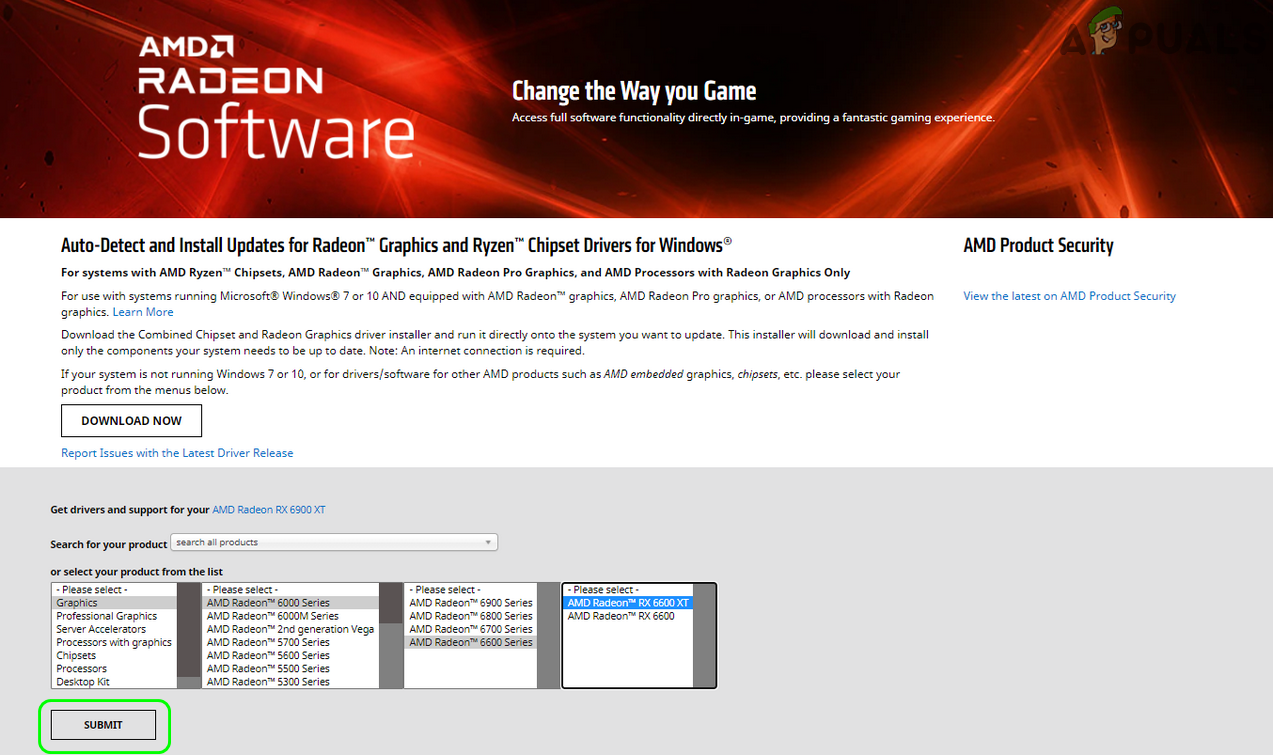
Select Your AMD Product and Click Submit - Then scroll down and click on Previous Drivers.
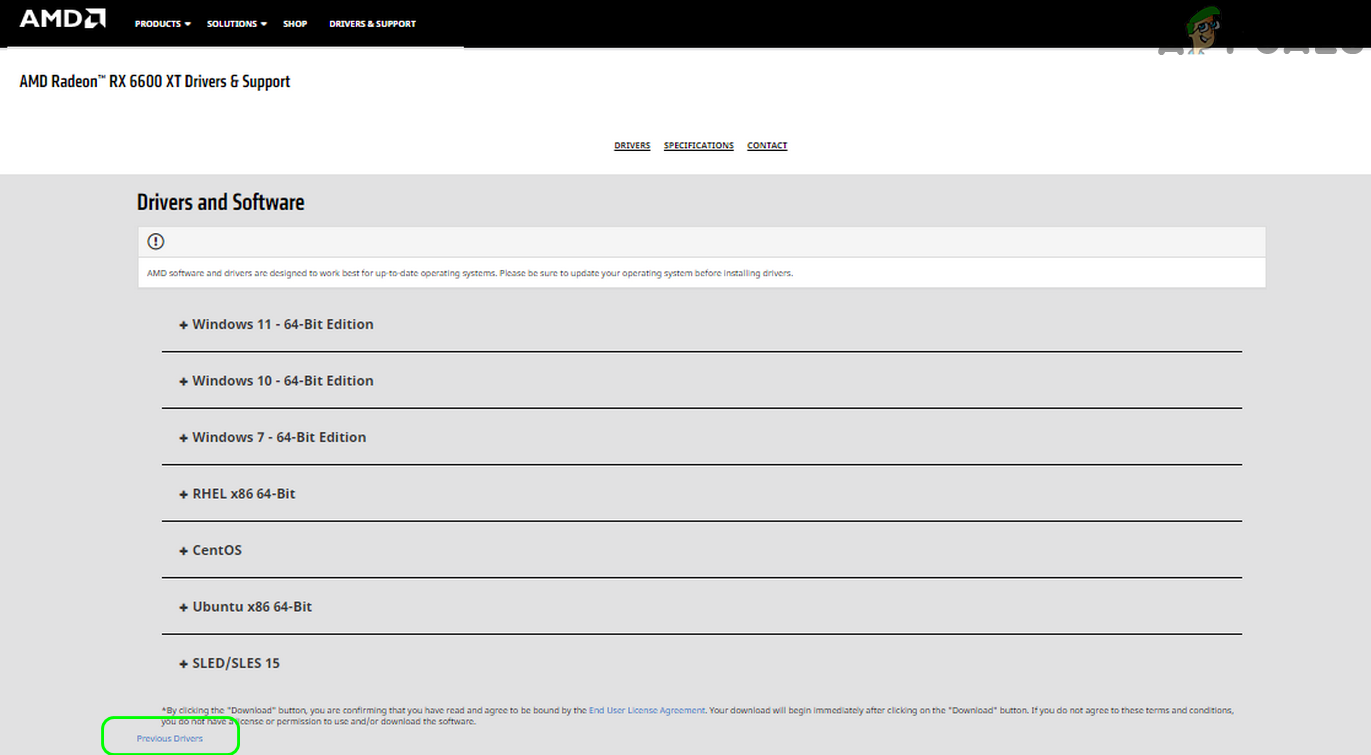
Download Previous Drivers of the AMD Card - Now download and install one of the older AMD drivers.
- Then restart your system and upon restart, check if the timeout issue is resolved. If not, then try the other older drivers one by one (one version at a time) and check if any of these drivers clear out the issue.
Use the Generic Windows Driver
- If the above did not work, uninstall the AMD driver as discussed above and reboot your PC.
- Upon reboot, let the Windows install its generic driver, and afterward, check if the AMD driver timeout issue is resolved.
- If no generic driver was installed, right-click on Windows and select Device Manager.
- Now expand Display Adapters (or you may have to look for an unknown device) and right-click on the AMD card.

Update Radeon Driver from the Device Manager - Then, select Update Driver, and afterward, click Search Automatically for Drivers.

Search Automatically for Drivers - Now, click on Search for Updated Drivers on Windows Update, and if an updated driver is available, download/install it.
- Then reboot your PC and upon reboot, check if the system’s AMD driver timeout issue is resolved.
Install the AMD Driver Without the Adrenalin Software
- Uninstall the AMD driver as discussed above and restart your system. Upon restart, download the latest AMD drivers with Adrenalin software.
- Once downloaded, launch the installer as administrator and click on Install to extract the files (keep a note of the path).
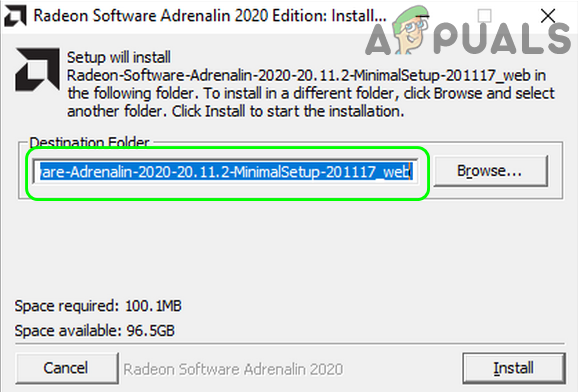
Copy the Path of the Extraction Folder of the AMD Driver - Once extraction is completed and the installer asks for installation, cancel it.
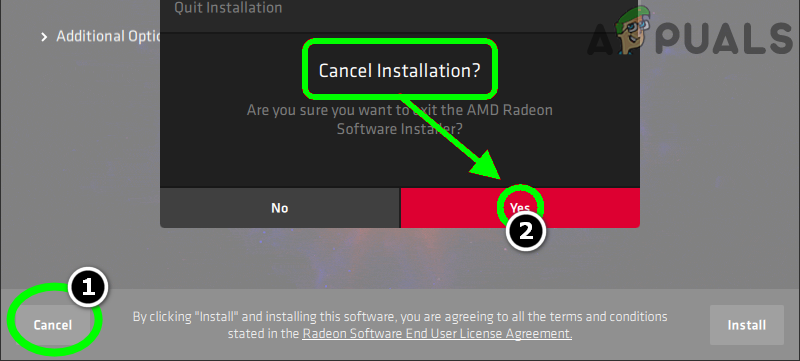
Cancel the AMD Installation - Now right-click on Windows and select Device Manager.
- Now expand Display Adapters and right-click on your AMD card.
- Then open Update Driver and select Browser My Computer for Drivers.
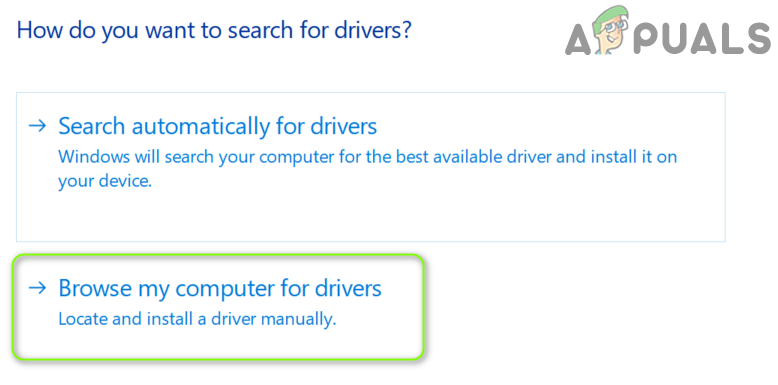
Select Browse My Computer for Drivers - Now head to the path of the extracted driver folder.
- Then click Next and let the AMD driver install.
- Now reboot your PC and upon reboot, check if the AMD driver timeout issue is resolved.
If that did not work, then check if disabling CPU virtualization in the system’s BIOS clears out the issue.
Edit the AMD Radeon Settings
There can be different improper configurations of the Radeon settings that can trigger the AMD driver to show the timeout message like the corrupt Shaders cache.
Warning: Proceed at your own risk as some of the undermentioned steps involve tweaking the graphics card (or overclock or underclock it), which can make the system unstable or may brick the system/card.
Clear the Shader Cache of the AMD Card
The AMD cards use a shader cache to boost loading times of the games by compiling and storing frequently used game shaders, in place of generating the shaders on every game launch. The AMD card may show the driver timeout issue if the shader cache of the card is either corrupt or overloaded. In this scenario, clearing the shader cache of the AMD card may solve the problem.
- Open the AMD Adrenalin application and open its Settings. Now head to the Graphics tab.
- Then click on Perform Reset in front of Shader Cache and afterward, confirm to reset the Shader Cache.
- Now check if the AMD driver issue is resolved. Keep in mind that you may have to clear the Shader cache whenever launching a game.
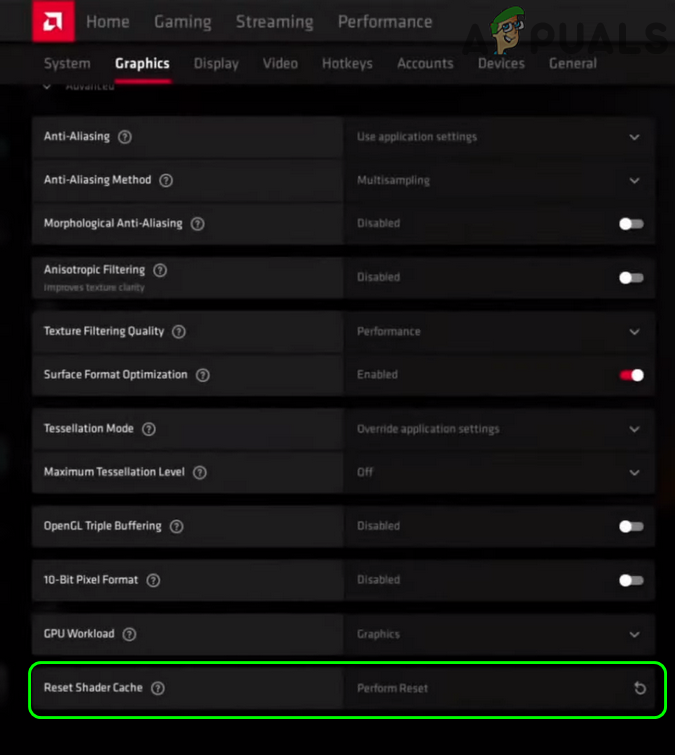
Reset the AMD Shader Cache - If that did not work, check if setting the Profile of the problematic game to the Standard clears the error.
Disable FreeSync and Virtual Super Resolution in the AMD Settings
FreeSync can sometimes not work as expected and cause more problems with the system instead of improvements.
- Launch AMD Radeon Settings and head to its Display tab.
- Now select the display (if using multiple displays) and toggle the switch of AMD FreeSync to the off position.
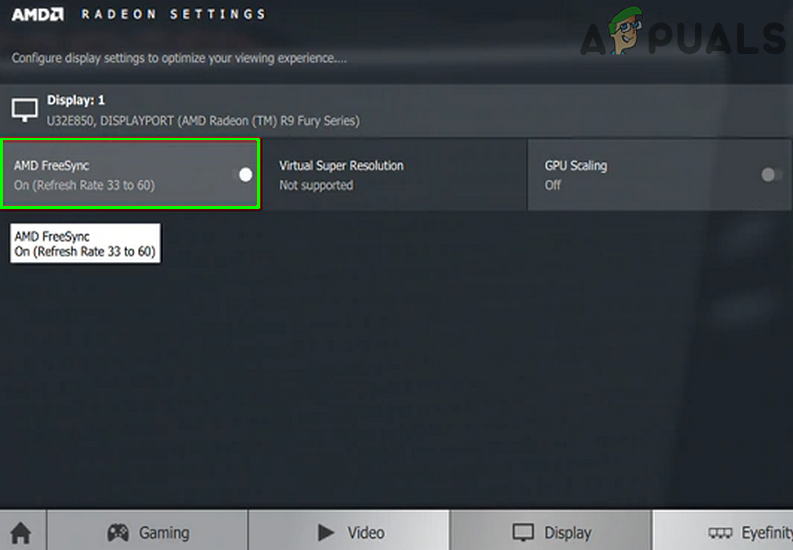
Disable AMD Freesync - Then apply the changes and check if the AMD driver issue is resolved.
- If that did not work, check if disabling the Virtual Super Resolution solves the problem.
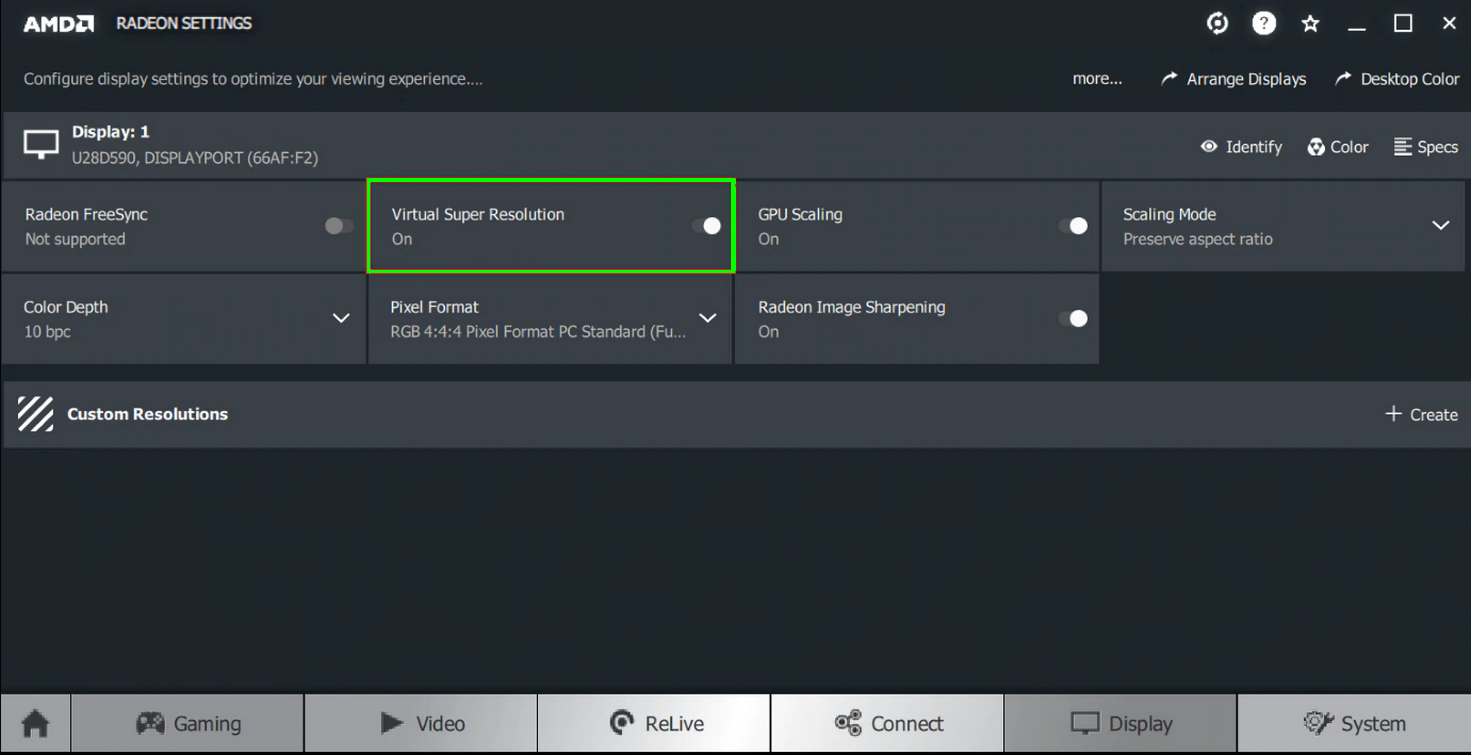
Disable AMD Virtual Super Resolution - If the issue persists, check if setting the Graphics Settings to Energy Safe clears out the error.
Edit the Frequency and Voltage Settings of the Card
- If the above did not, work, then launch the Radeon Software and head to the Performance tab.
- Now head to Manual and activate GPU Setup>>Advanced Control.
- Then set the maximum GPU frequency to 2 times lower and apply your changes.
- Afterward, check if the AMD driver issue is resolved.
- If not, then check if setting the Frequency to 1350MHz and Voltage to 850 MV (after enabling it) clears out the issue.
- If that did not work, then check if setting frequency to 2000MHz and voltage to 1100MV solves the issue.
- If the issue persists, then check if enabling Automatic>> Undervolt GPU clears out the problem.
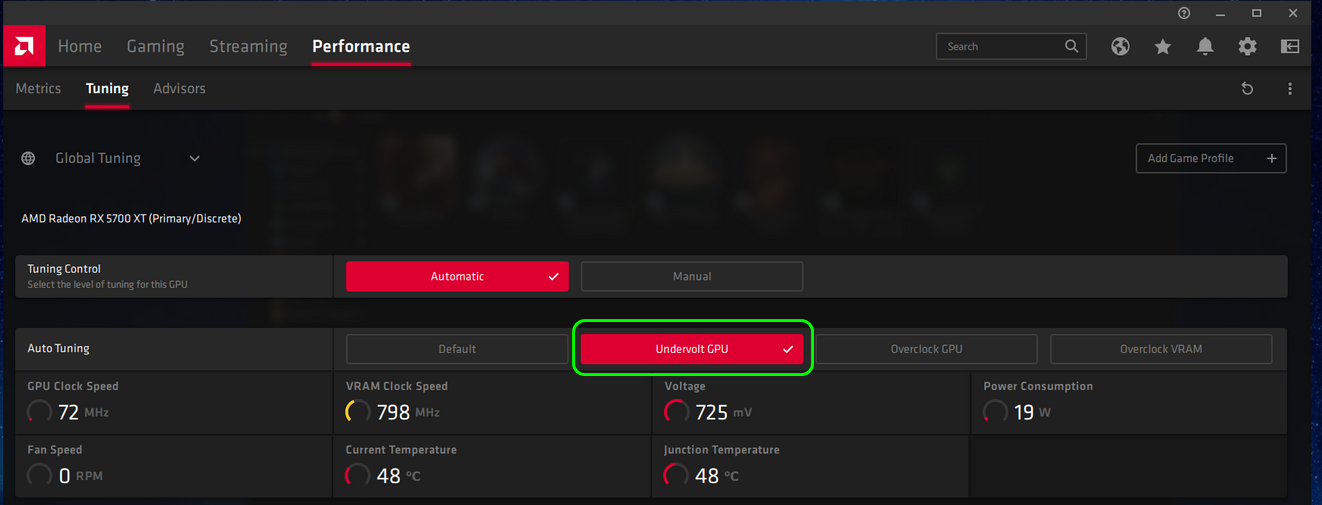
Auto Undervolt AMD GPU
Increase the Power Limit of the Card
- Launch the AMD Radeon software and head to its Performance tab.
- Now navigate to the Tuning tab and select Manual.
- Then enable Power Tuning and increase the Power Limit by 50%. Then apply your changes.
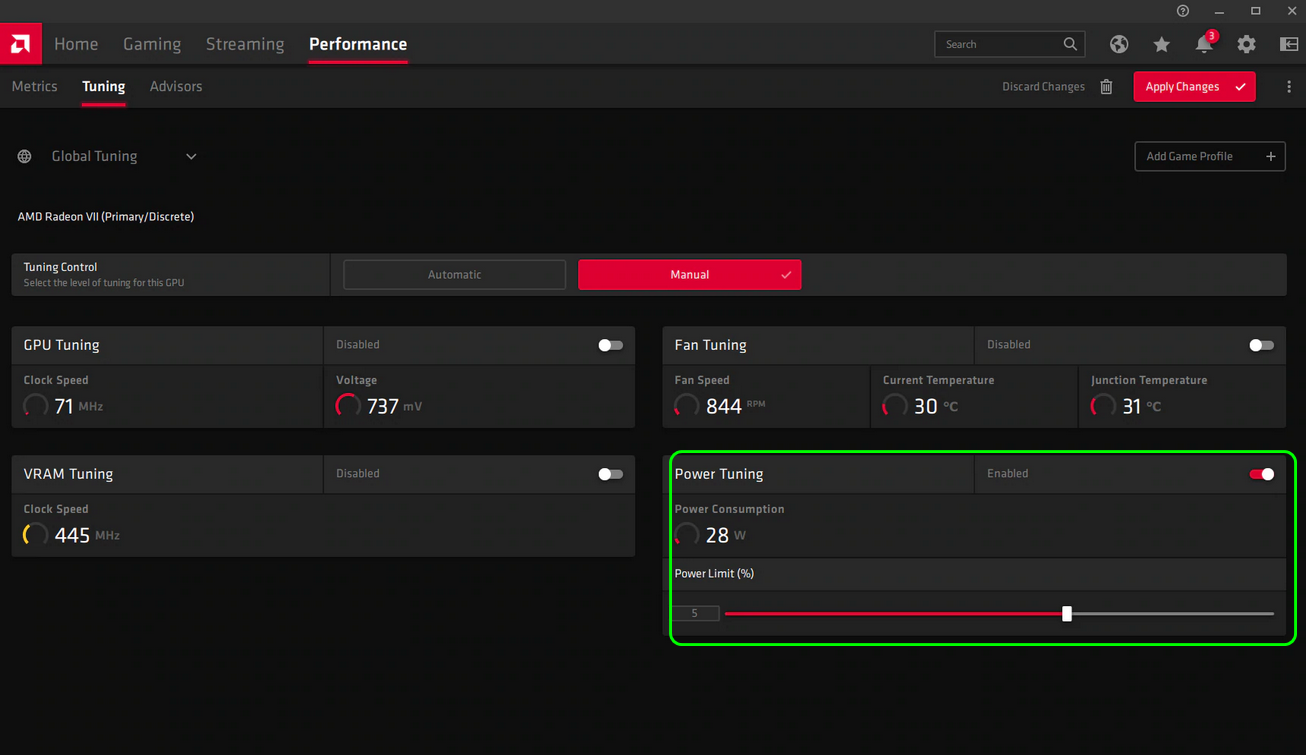
Increase Power Limit of AMD by 50% - Now reboot your PC and upon reboot, check if the driver timeout issue is cleared.
If that did not work, check if plugging the system directly to a power socket (not to an extension cable or power strip) solves the problem.
Fine Tune the System’s Fan
- Launch the AMD Radeon software and head to the Performance tab.
- Now click on Tuning and enable Fan Tuning.
- Then check if increasing the Max-Fan Temperature to 100 degrees solves the issue.
If none of the above did the trick, check if updating the AMD card’s BIOS/firmware to the latest build or reverting to an older version (if the issue started after a BIOS update) solves the problem.
Edit the System’s Registry
If due to a glitch, the driver is taking too much time to respond to the OS, then it may result in the timeout issue at hand. In such a case, increasing the wait time of the OS (i.e., TDR Delay) may solve the problem.
Warning: Proceed at your own risk as fiddling the system’s registry may expose your data/system to threats. Also, make sure to create a backup of the system’s registry.
- Click Windows, type Registry Edit, right-click on it, and select Run as Administrator.
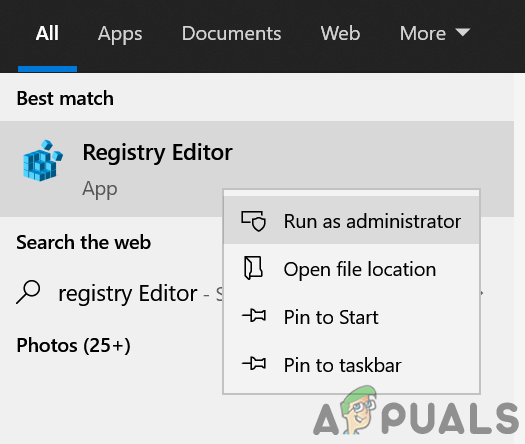
Open Registry Editor as Administrator - Now navigate to the following path:
HKEY_LOCAL_MACHINE\SYSTEM\CurrentControlSet\Control\GraphicsDrivers
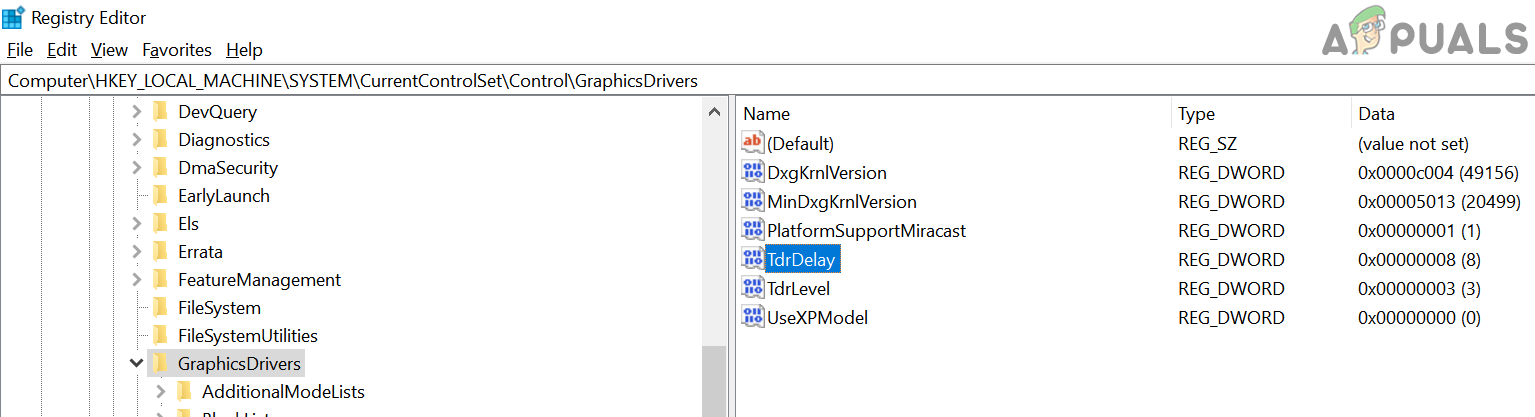
Create a TdrDelay Registry Key and Set its Value to 8 - Then, in the right pane, right-click on the GraphicsDrivers and select New>> Dword (32-bit) Value.
- Now name the key as TdrDelay and set its value to 8 (or 30).
- Then, again right-click on the GraphicsDrivers and select New>> Qword (64-bit) Value.
- Now name the key as TdrDelay and set its value to 8 (or 30).
- Then close the Registry Editor and restart your system.
- Upon restart, check if the AMD issue is resolved.
- If not, open Notepad and copy the following to it:
Windows Registry Editor Version 5.00

[HKEY_LOCAL_MACHINE\SYSTEM\CurrentControlSet\Control\GraphicsDrivers]

“TdrDelay”=dword:0000000a

“TdrDdiDelay”=dword:00000019
- Then save the file with the .reg extension e.g., TDR.reg, and close Notepad.
- Now double-click on the file created with .reg extension e.g., TDR.reg, and when asked to, click Yes to add the entries to the registry.
- Then reboot your PC and upon reboot, check if the AMD driver timeout issue is resolved.
If the issue is still there and is occurring in a particular program/ game, then check if reinstalling that game or program (like Adobe After Effects) clears out the issue. Keep in mind, some games (like TBC Classic) prefer to use DirectX 11, so, make sure, they are using the correct DirectX version. In case of a browser (like Chrome) showing the driver timeout issue, check if disabling its hardware acceleration solves the problem. Moreover, some users have reported that keeping the AMD Radeon software running in the minimized state cleared the issue for them, so, make sure that is not an issue with you.
If that did not work, check if resetting the PC to the defaults or reinstalling the OS clears the AMD driver issue. If the issue returns, then get your GPU checked for a hardware issue. You can confirm the same by using another GPU in the system or trying the GPU in another system.