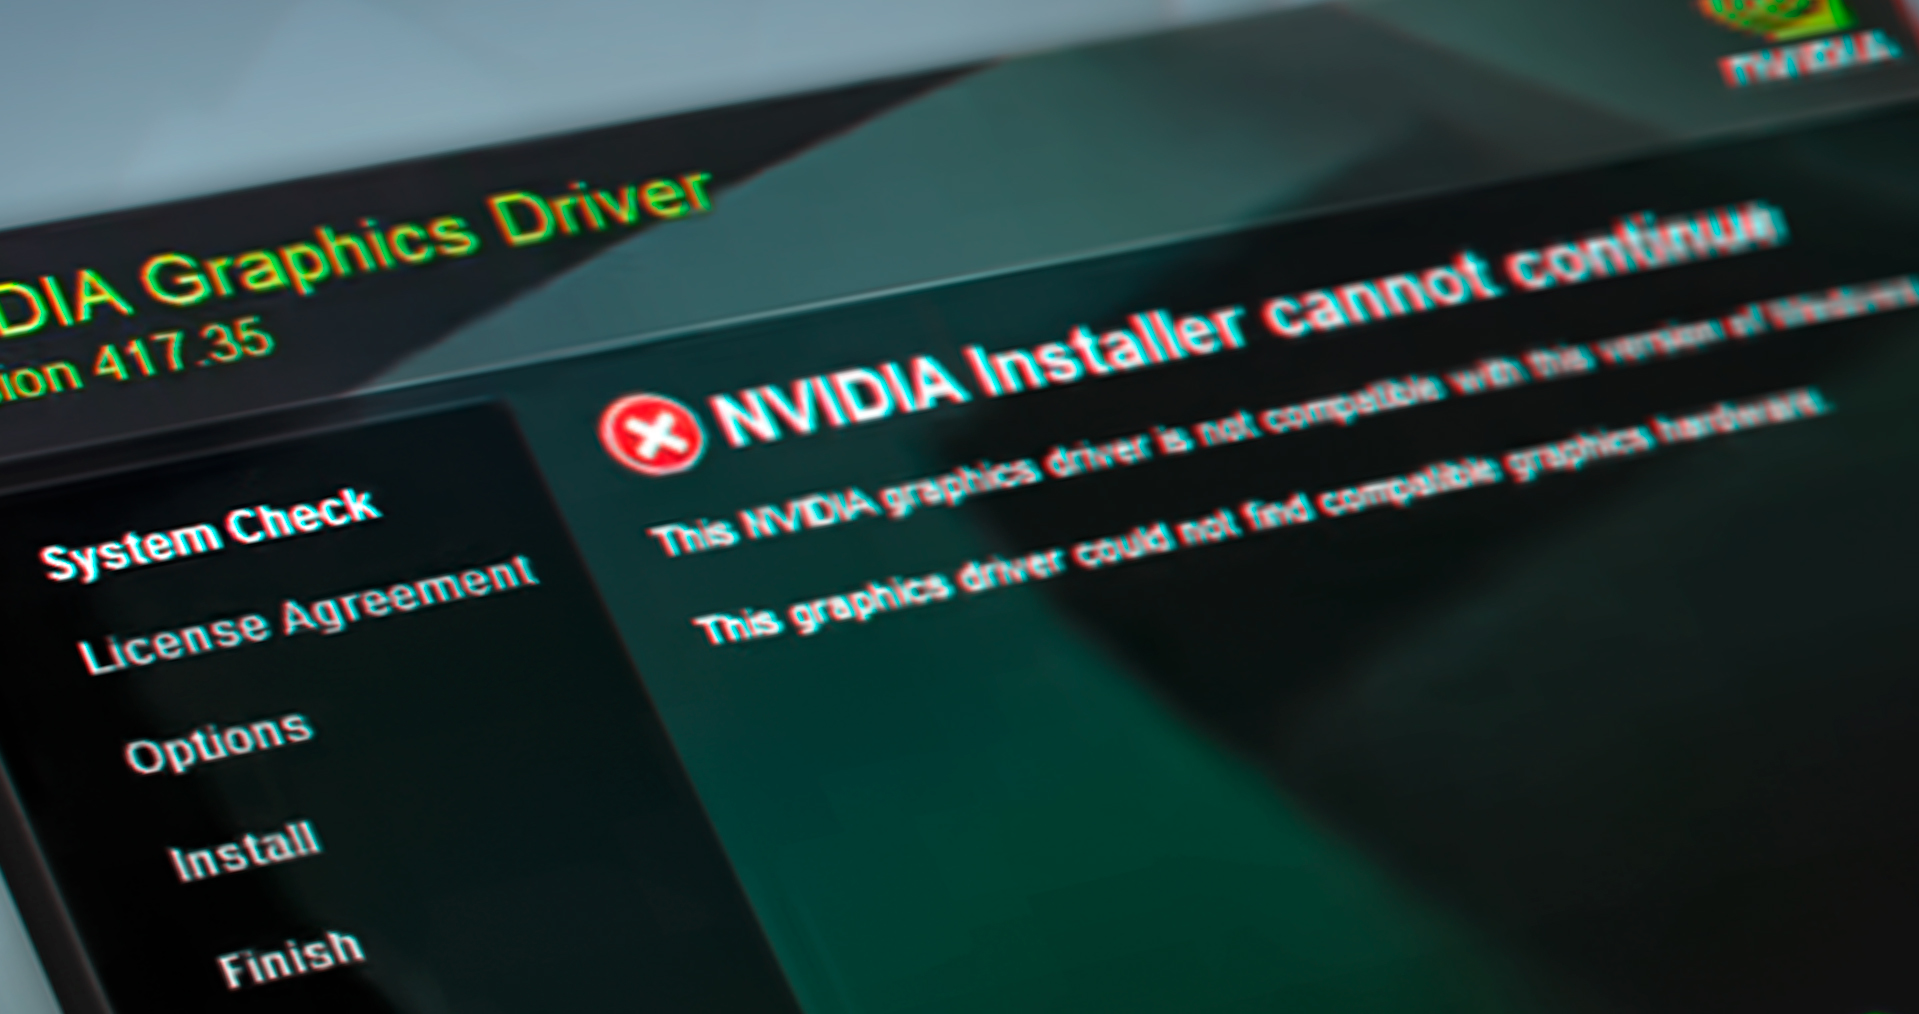
The NVIDIA Installer Cannot Continue error mainly occurs due to the wrong device ids in the INF file. However, it might not be a root cause in your case, as other causes can lead you to this error. If you face this error while installing or updating the driver from the Nvidia application. In this case, you can try downloading and installing the particular driver from the official website, which might be helpful. If that does not work, try using the methods below.
1. Install the Drivers Provided by your Manufacturer
If you are using a laptop and facing this issue, it means that the driver isn’t compatible with your laptop because sometimes laptop manufacturers release custom drivers for their laptops to make sure they don’t overheat and run as intended. If you are on Desktop PC you can move directly to next method. Follow these steps on laptop:-
- First you will have to find your laptop’s model number.
- Press the Windows key + R key at the same time.
- Now type “dxdiag” in the Run program Window.
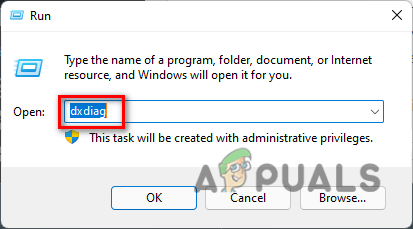
Opening DxDiag Windows - Wait for the Program to start.
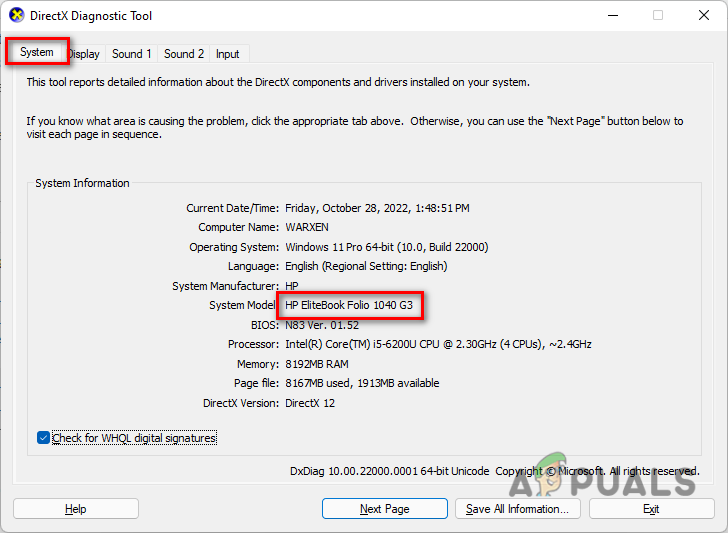
- Once it’s opened, in the General Tab, note down the “System Model”.
Checking Laptop’s System Model - Now search this model number on any browser and type ‘Drivers’ In front of it.
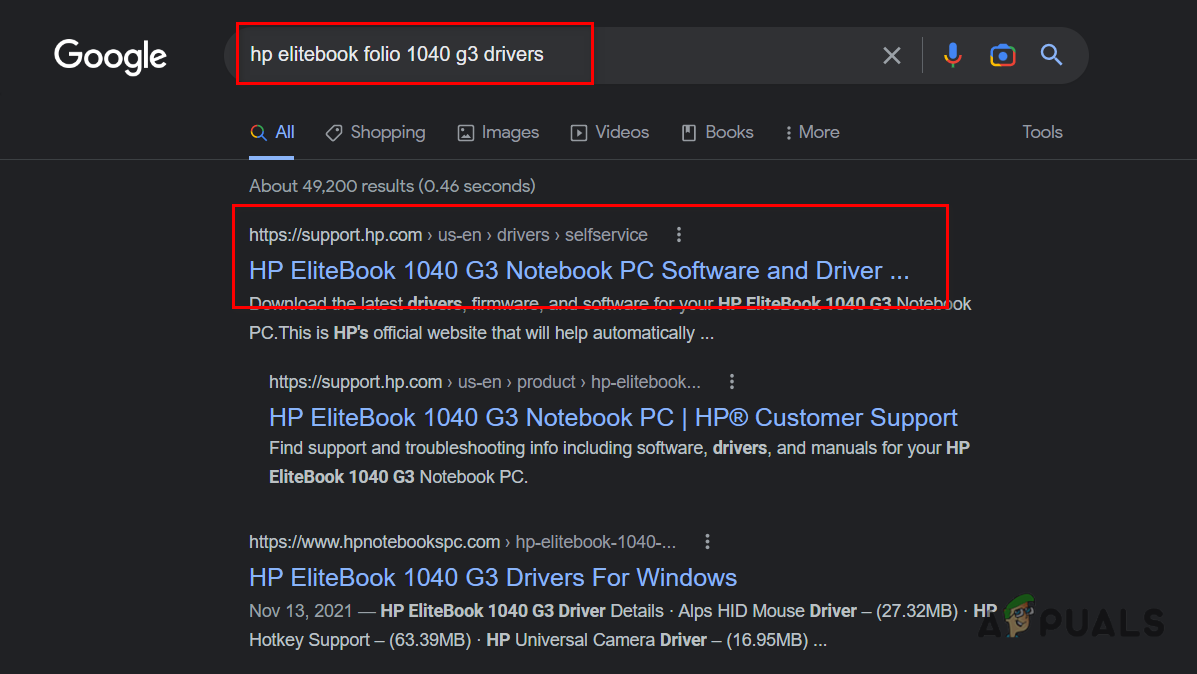
Opening Official Support Page of Laptop Make sure you are opening the official website. Don’t open any fishy website.
Note: This step varies from manufacturer to manufacturer basically what we are trying to do is install the drivers provided by your manufacturer, if you are stuck here you can post your model number in the comments and our technician will guide you.
- Once on the support page find for “Drivers” section.
- Now select your operation system (if applicable), and Download the official Graphics driver.
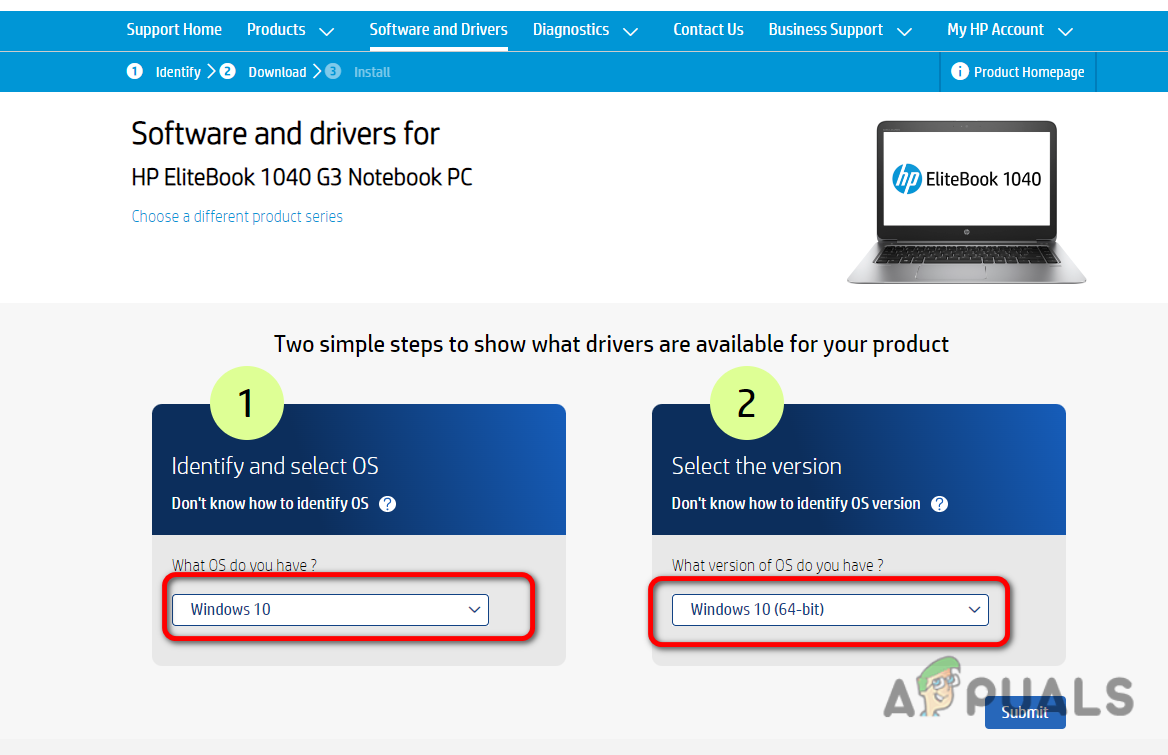
Selecting Operating System - Once the driver is downloaded simply install it and restart your computer.
Downloading Graphics Driver from Product Page
If you can’t able to install the driver, you can follow the steps mentioned below.
2. Update The Driver With The Device Manager
Before try fixing this issue, you can save yourself from doing complicated things, as it can take your time. So the simple fix, which has worked for most users, is to update the driver from the device manager, but it’s not the same way you normally do to install or update the driver via the device manager.
This solution is only for those facing this error while updating the driver, not installing the driver.
First, you need to download the driver from the official website; then, you need to extract the setup to get the Nvidia driver folder and then install the driver through the device manager. Follow the below steps to do this:
- Go to the official website of Nvidia and select your Graphics card
- Then, download the Graphics driver and wait for the downloading to complete
- Once it’s done, right-click the setup and click Extract to “<Path>\<Driver Name>”
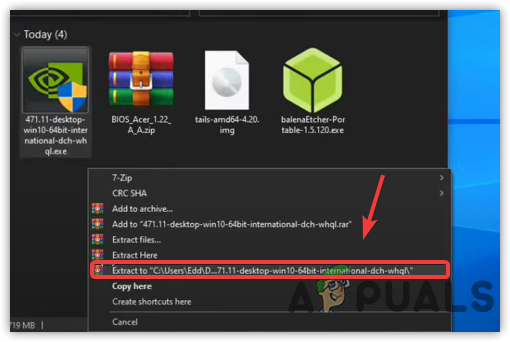
Extracting Nvidia Driver - Once the extraction is finished, right-click the Start Menu
- Click Device Manager
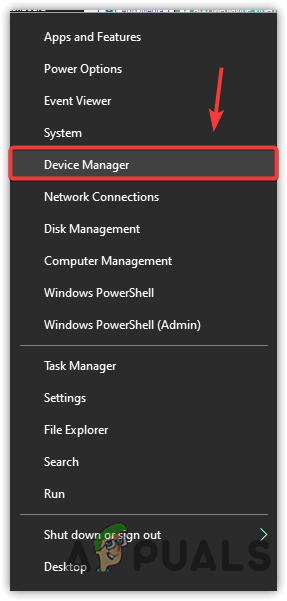
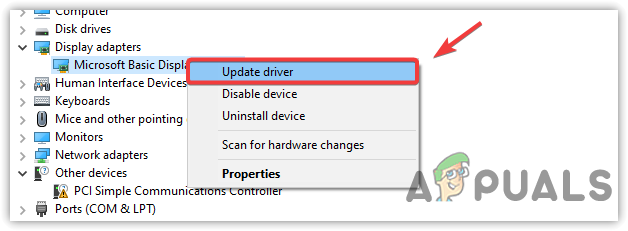
Opening Device Manager From Start Menu - Expand the Display Adapters
- Right-click the Microsoft Display Adapter and click Update Driver
Updating Driver Via Device Manager - Choose Browse My Computer For Drivers
- Then, click Browse
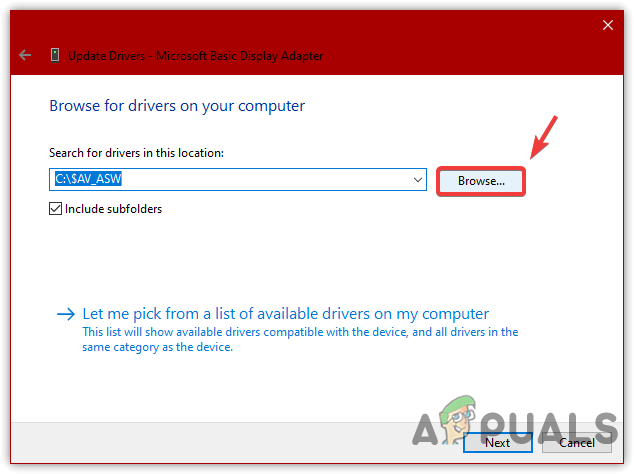
Browsing For Driver - Go to the directory where the driver is downloaded
- Select the extracted driver folder, then click Next to install your driver
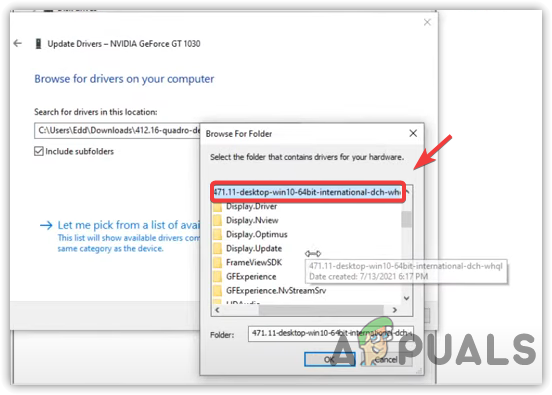
Selecting Extracted Driver Folder - Once done, your driver should be properly installed.
3. Replace Device IDs In INF File
The error mostly appears when there is an incorrect entry of hardware ids in the INF file. A Setup Information File (INF) stores all the information that needs to install a driver. You will encounter this error if this file contains the wrong hardware ids. Therefore, you might need to edit the inf by following the steps below.
- Go to the official Nvidia website and download the driver from there

Downloading Driver For Windows - Then, once the driver setup is downloaded, double-click on the setup installer and click OK to extract the driver
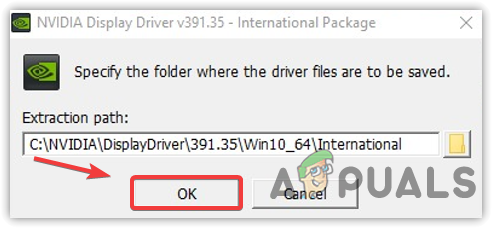
Installing Graphics Driver - Once the setup is installed, go to the directory that you have selected while installing the driver. If you did not choose any directory, then navigate to the following one, which is the default
C:\NVIDIA\DisplayDriver\391.35\Win10_64\International\Display.Driver
Note: Do not copy the path as the driver version and Windows version might not be the same as mentioned above
- Here find the INF file according to your desktop or laptop manufacturers mentioned below
INF Files According to Manufacturers
Acer = nvaci.inf
Asus = nvami.inf
Apple = nvaoi.inf
Compal = nvcti.inf
Clevo nvcvi.inf
Dell = nvdmi.inf
fujitsu = nvfmi.inf
HP = nvbli.inf or nvhmi.inf
LG = nvloi.inf
Lenovo = nvlti.inf
MSI = nvmii.inf
NEC = nvmii.inf
Sony = nvszci.inf
Toshiba Qosmio = nvtdi.inf
Toshiba = nvtsi.inf
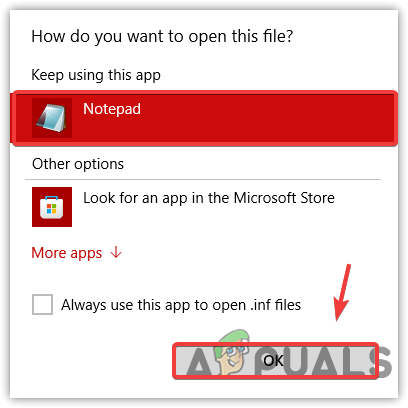
- Right-click on the INF file and click Open With
- Select Notepad and click Open
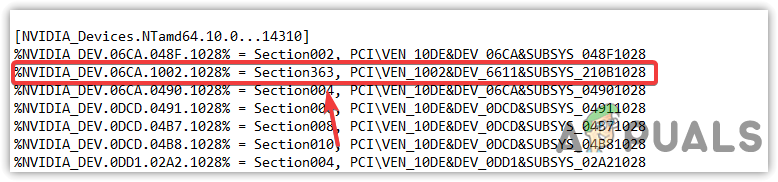
Opening INF File With Notepad - Once the INF file is opened, scroll down to the [NVIDIA_Devices.NTamd64.10.0…14310]
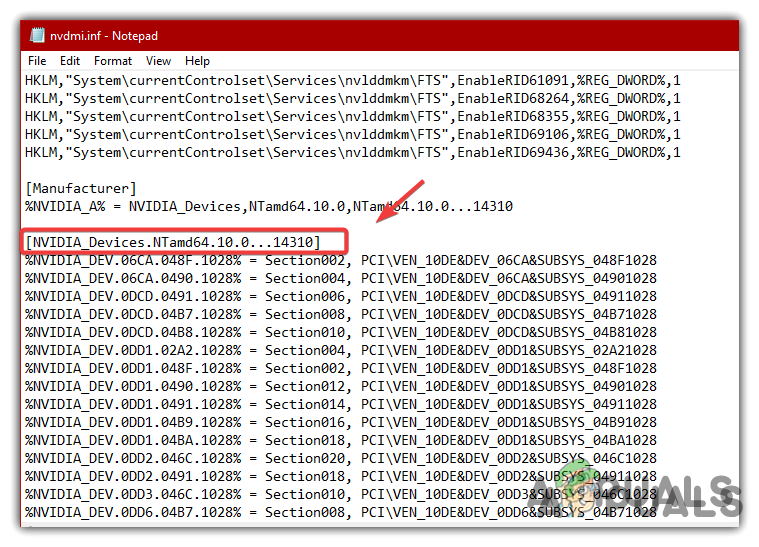
Finding Nvidia Devices Section - Make a new line by clicking and pressing enter key at the end of the second raw of the first line
- Once you have created a new line, copy the content of the first raw of the first line and paste it into the new line
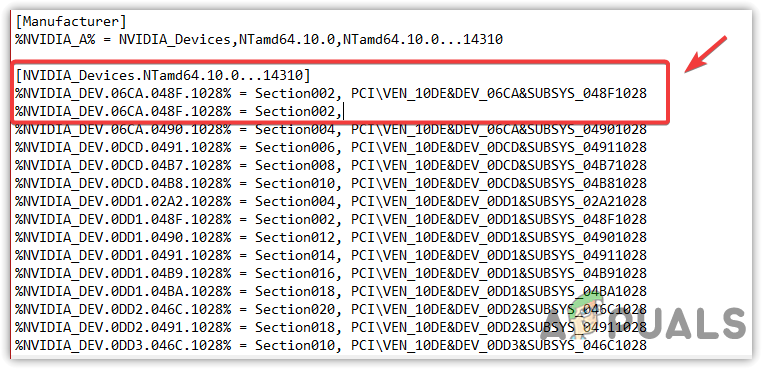
Creating A New Line For the Nvidia GPU Code In The INF File - Now click Start Menu and type Device Manager
- Open Device Manager
Opening Device Manager - Expand the Display Adapters by clicking on the drop-down icon
- Right-click on Microsoft Display Adapter
- Go to Properties
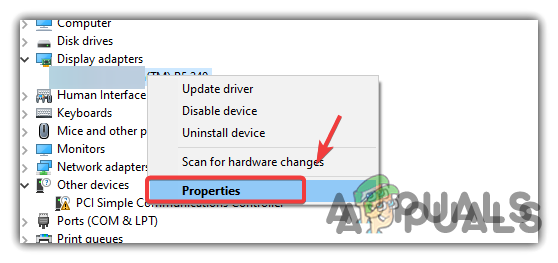
Opening Driver Properties - Then, go to Details
- Select Hardware Ids from the Property menu
- Right-click on the 2nd hardware Id and click Copy
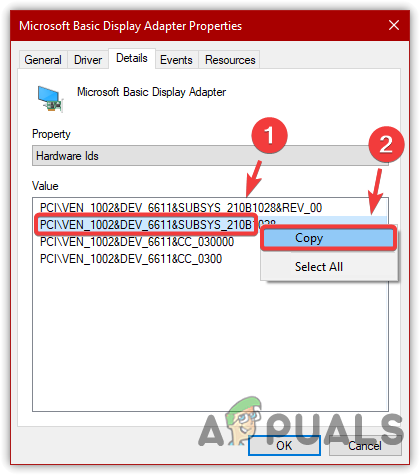
Copying Hardware Ids For Microsoft Display Adapter - Open the notepad again and paste the copied id in the second raw of the new line
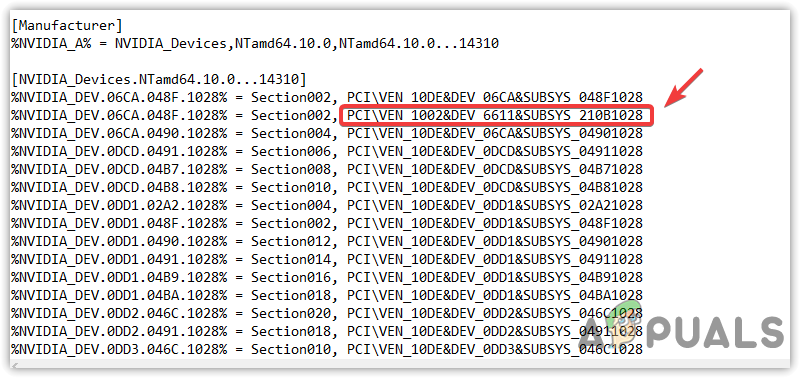
Pasting Copied Hardware Id In The INF File - After that, copy the GPU Id number
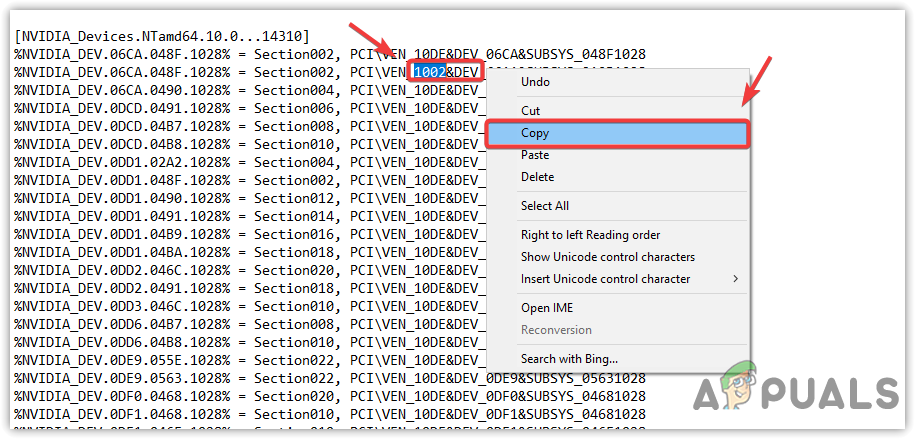
Copying GPU ID Number - Replace the Nvidia device code with GPU Id Number

Replacing the Nvidia Device Code With GPU Id Number - Once done, now check what the last section number is. In my case, it is 362, so I will change the new line section number to 363
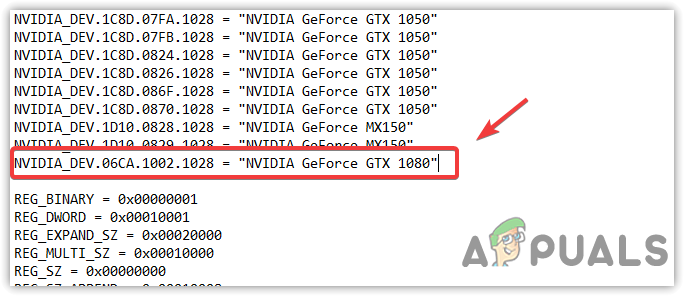
Changing Section Number - Once done, copy the modified Nvidia GPU Id and scroll down to the [Strings] section

Copying Modified GPU Id - Again scroll down to the end of the [Strings] section
- Make a new line and paste a copied Nvidia GPU code
- In the second section of the new line, type your GPU name and make sure to follow the same pattern by following other mentioned entries
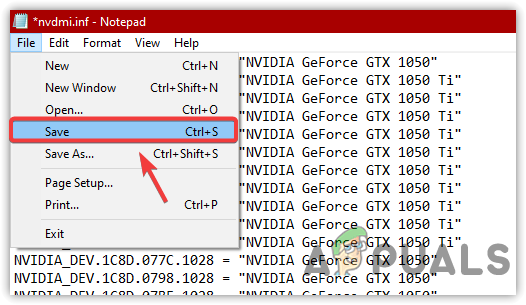
Pasting GPU Id With The Graphics Card Name - Once all is done, press Ctrl + S or click on File and click Save
Saving Changes In INF File - After that, scroll down to the bottom in the same directory where the INF files are located
- Then, double-click on the setup to run and install the driver

Running Driver Setup - Once done, check if the issue is fixed.
4. Rename NVIDIA Graphics Folder
If the issue is not resolved yet, then you can try renaming the Nvidia folder in the system drive. When you rename a folder, all the services associated with that folder will not run, as the path of this folder has been changed. Therefore, it might install the driver successfully. Below are the steps:
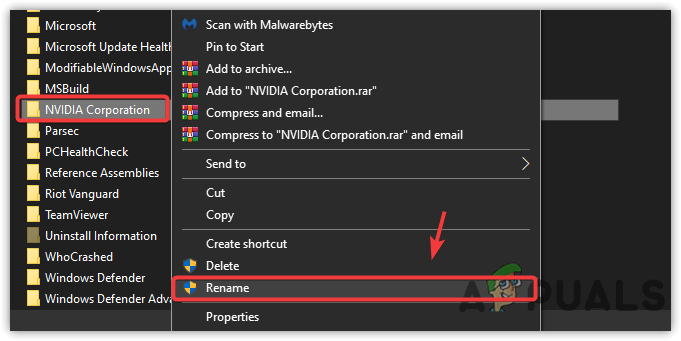
- Launch File Explorer and go to the system drive
- Then, Program Files and then right-click NVIDIA Corporation
- Click Rename and change its name to anything else. We recommend using a name related to Nvidia. So it can easily be remembered what it is for and why you have created it.
Renaming Nvidia Folder - Once done, run the driver setup and the error should not persist.
5. Do A Complete Reinstall Of Nvidia Software And Driver
If nothing works, you need to remove all the traces of your driver, as they might lead you to this issue. To completely remove the drivers with the registry files, you need to use the Display Driver Uninstaller application. It allows users to delete the drive and their software entirely from the computer without leaving a trace behind. Below are the steps:
- Download the Display Driver Uninstaller from the link
- Once you have downloaded it, right-click on the DDU ZIP folder and click Extract to DDU
Note: We recommend WinRar for the extraction process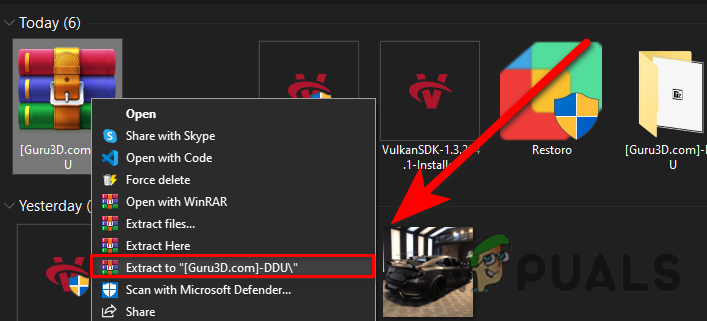
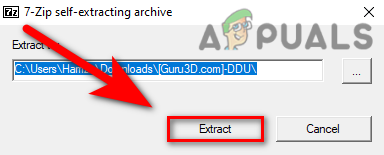
Click to Extract DDU Folder - Navigate to the DDU folder and double-click on the Display Driver Uninstaller
- It will bring a short Window, and you need to click Extract
Extracting DDU Application - Once the extraction process is finished, go to the extracted folder
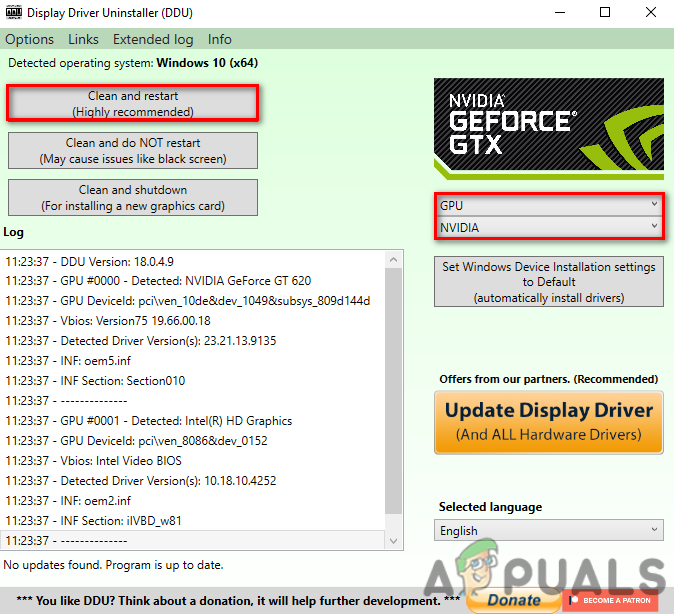
- Double-click on the DDU application to launch
- Here is a tip, DDU recommends uninstalling the driver in Safe Mode. However, if you do not want to go into safe mode, you can proceed, but it might be better to uninstall the driver in safe mode
- Once the application is launched, select the Device Type, which will be GPU and the Device, which will be your Graphic Card
- After that, click Clean & Restart or Clean And Do Not Restart
Clean Uninstallation Of Graphics Driver - Once done, now go to your GPU manufacturer’s website and download the latest driver
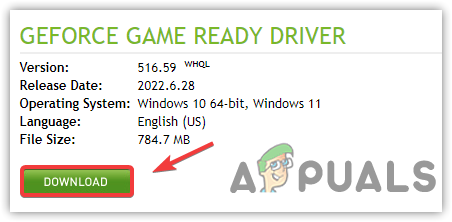
Downloading Latest Graphics Driver For Windows Note: You can also download the automatic detection software. If you are using a laptop, we recommend installing the compatible driver for your laptop, which you can find on the laptop manufacturer’s website.
In case all the methods mentioned above fail to fix this error, then either restore your computer to a previous state or reset your Windows without losing the data. After applying one of the methods, you need to download and install the driver from the official website.