You may have noticed that some blogs, online personalities, and corporate brands have been making use of Facebook’s ability to display 360-degree photographs. With these photographs, a user is able to scroll around a 360-degree image. The platform even supports 360-degree video, which allows for the same features, but with HD video.
These 360-degree graphics are great for poking around on your regular flat screen, but they can also be amazing for virtual reality platforms like Google Cardboard. This platform allows users to turn their phone into a virtual reality device. But how do you create these images?
With a little help from affordable new hardware, you can create your very own virtual reality videos and 360-degree photographs.
Try the Insta360 Nano
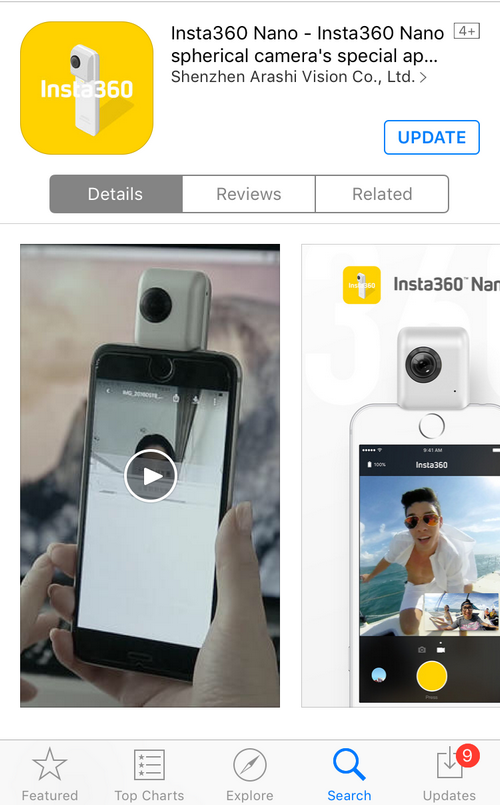
One of the cheapest and easiest ways to create a 360-degree video and picture is with the Insta360 Nano. Designed specifically to clip right onto your iPhone, this 360-degree camera is small and lightweight, at just 70g. You can pick up the Insta360 Nano on major retailers like Amazon for anywhere between $200 and $300.
Attach the Insta360
The Insta360 Nano device attaches to your iPhone via the Lightning charger port. You’ll need to turn your iPhone upside-down in order to use it, as the camera should be situated at the top. You’ll be able to attach it to iPhones 6 and up.
Download the App
Insta360 also comes with an application that can be downloaded from the Apple App Store for free. Once you’ve located the app, downloaded and installed it, simply open it up and you’ll be given the option to record either an image or a video. Use the photo camera to create a still image, or the video camera for a video. The large circular button at the bottom is the shutter button, and the small circle on the bottom left will take you to your gallery.
It’s important to keep your device as still as possible when taking your shot, as even the slightest blur can ruin your 360-degree image.
Use an SD Card
If you want to save the image directly to an SD card – which is ideal for 16GB iPhone users – then you can simply slip in a MicroSD card into the TF Card slot which is found at the bottom of the Insta360 Nano. There is no expandable storage on any iPhone. The LED will turn green after inserting the card, signalling that you can take a photograph.
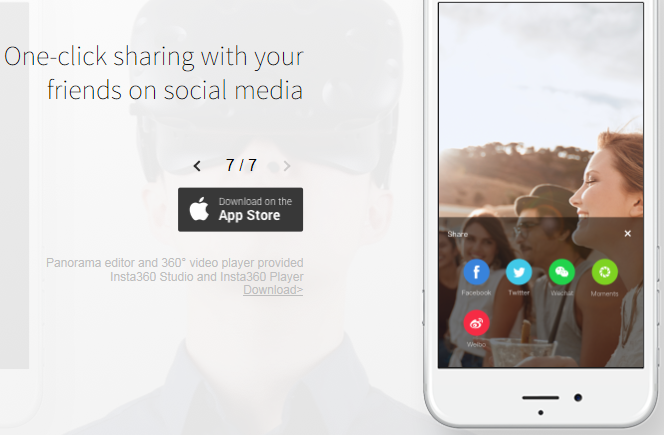
Sharing Your Image
Once you’ve captured a 360-degree image that you’re happy with, you can share it directly to your friends on Twitter or Facebook. Simply look for the button in the top right of the screen, and you’ll be given sharing options that will fire off your image or video to your friends and followers.
Sharing Your Video
Sharing a video isn’t quite as simple as sharing an image, but it’s still not complicated. You won’t be given a 360-degree preview of the video like you do with the image, as Facebook will need to go about stitching the images and frames together. This means the upload will take a little longer. The video also won’t be available immediately. A 20-second clip can take anywhere up to 10 minutes to process once you have uploaded it.
Can’t Afford Extra Hardware? Try Panorama Photos
Facebook also allows you to upload panorama shots, which can be taken on your Android, iPhone or Windows phone. A panorama photograph is simply extra-wide, meaning you can take wider photographs of scenery, or capture an entire room in one single, flat photograph.
Here’s how you do it
Using iPhone
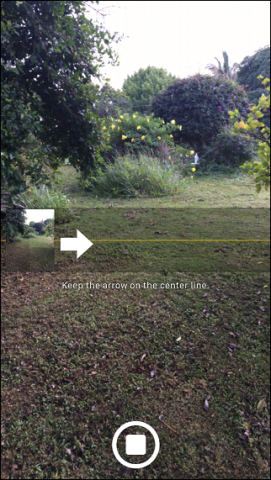
On your iPhone, load up your camera app and at the bottom, swipe from PHOTO and SQUARE to ‘PANO’. Point your camera towards the first part of the scene you would like to shoot, and you will be given instructions to move your iPhone continuously when taking the panorama photograph. There is an arrow that will move as you move the camera – the aim is to keep the arrow perfectly on the yellow line. Complete this, and your phone will generate a super-wide image.
Using Windows
For a long time Windows Phone users required an application to create panorama apps, but the Microsoft Camera app for Windows 10 Mobile now includes a panorama picture mode.
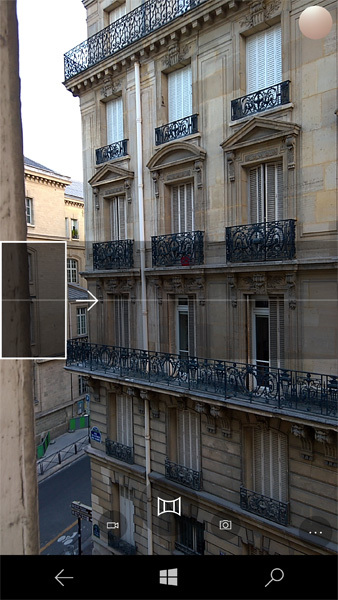
Once you open up the app, you’ll see a ‘panorama’ option right next to the regular camera and video buttons. Choose panorama, and you will be presented with a screen similar to the iPhone offering. You will start your photograph in portrait mode, and gradually move the phone to the right, keeping the arrow on the line, until you have completed your image.
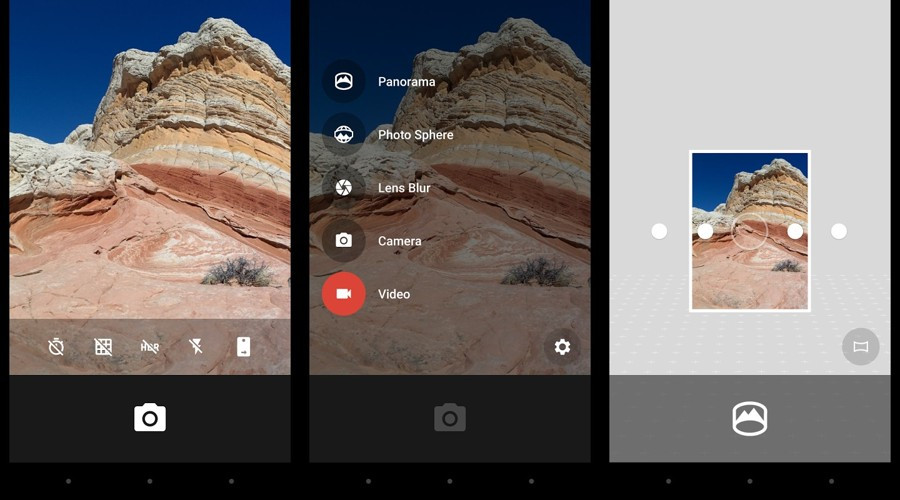
Using Android
In the stock Android camera application, select ‘MODE’ at the bottom of your screen and choose ‘Panorama’ on the left side of the screen. Unlike the iPhone and Windows, this panorama feature requires you to balance a small circle inside a large one each time you turn your camera. This function ensures that each frame, once stitched together, matches up seamlessly.