Digital Interior Design: How to Create a Custom Floor Plan using Live Home 3D
In the age of digitalization, we have every possible tool that we could need at our disposal. These tools are designed to make our lives easier. From making electronic component’s parts to designing a new sketch for a comic book character, nothing is impossible now with our current age of rapidly growing and moving forward. Among this, architectural plans have found themselves to be of particularly beneficial for those who use these type of software. You can save time by not having to manually adjust the minute details, save money and make things easier for the builders.
We’ve moved past the stage where we had to draw out complex plans while keeping in mind the precise measurements. Live Home 3D is a very popular and useful tool for architects because it lets them easily plan out plans. From making full house plans with decors to just basic outlines of a floor, Live Home 3D lets you do it all with an easy to use and understand UI. Today, we’re going to be looking at how you can design a custom floor plan using Live Home 3D and come out as a professional and expert in this field.
Downloading and Installing Live Home 3d
Designing your dream house on Live Home3d is particularly easy because it is not made just for professional architects. In fact, you can use it too to plan out those new renovations you’ve been thinking of. The first step is downloading Live Home 3d here. This is a free to use app and comes with in-app purchases that you can make to get that next edge that Live Home 3D offers.
Getting things started
When you install Live Home 3D and launch it, you are greeted by a screen that lets you choose the scale. Apartment, House and Room scales are the three different options at your disposal. Select the right scale and you can get things started.
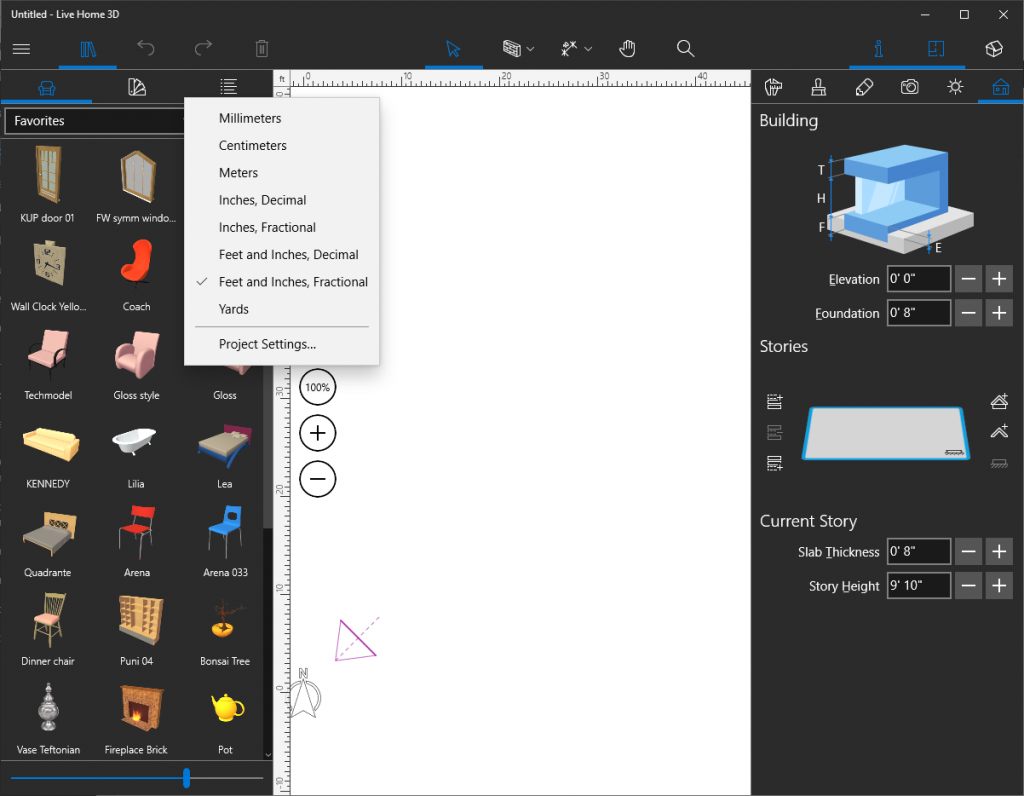
Before you start working on your project, you need to make sure that the measurement units are what you need them to be. You can do so by clicking on the top-right little square on your home screen which is displaying a unit abbreviation by default.
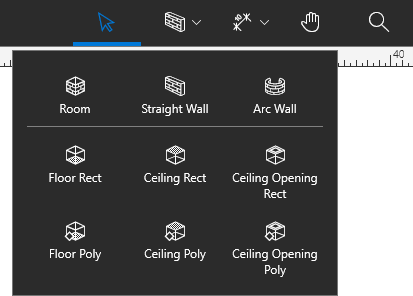
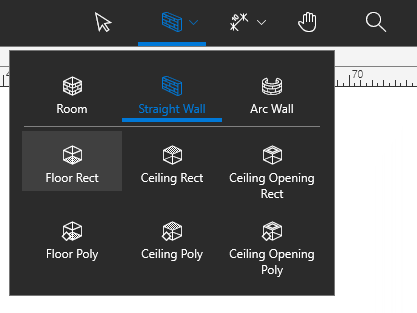
When creating a floor plan, there are a few tools that are going to be needed. Walls, arch walls etc are important when designing a plan. All of these tools can be found Building Tools menu on the top.
Designing a plan
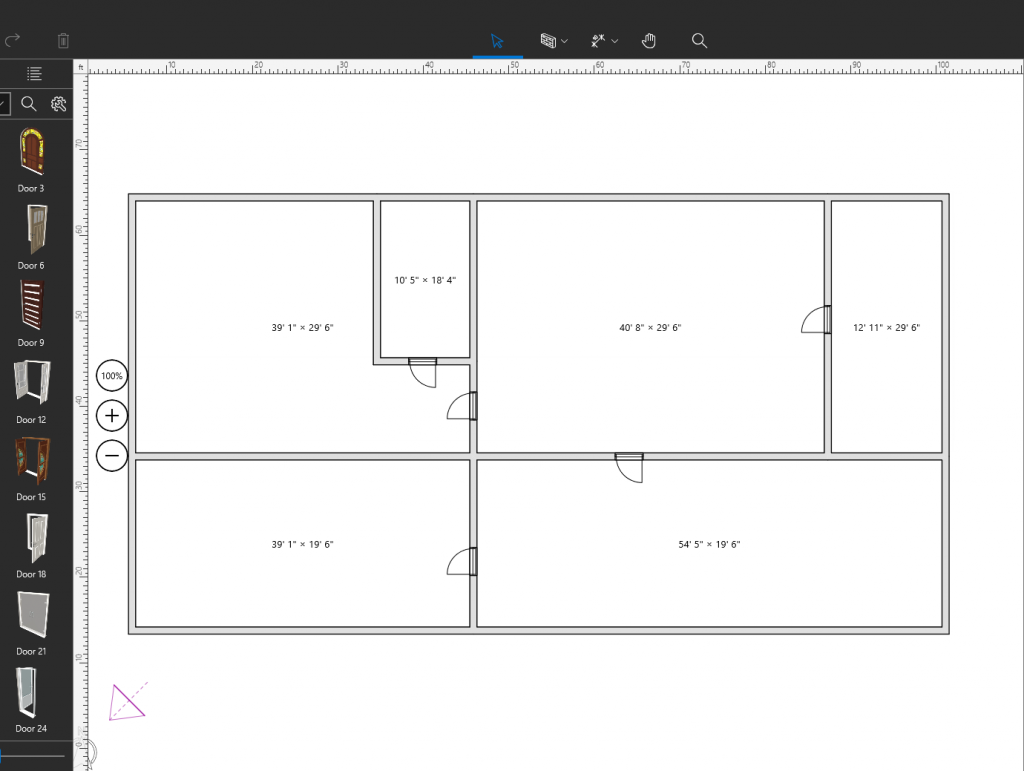
When designing a floor plan, it is very important that you keep the measurements and the scale in check. When drawing a room or a wall, Live Home3d displays the measurements of said wall according to the scale and units that you have selected. Another important thing that Live Home 3D does is that it automatically creates a ceiling when you make an enclosed room. So you do not have to worry about that. In addition to that, you do not have to worry about making gaps to make space for windows and doors. They can be added later on with just a simple click.
The beauty of Live Home 3D is in its ease of use for even the beginners who have never gotten their feet wet in such a matter.
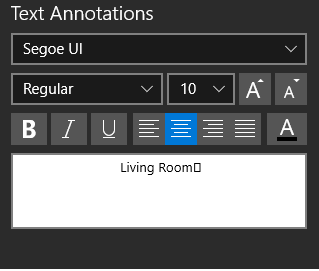
Add doors, make rooms and adjust other little details however you want to. Doors and windows can be added by selecting doors from the left menu and dragging and dropping them onto your plan. By default, Live Home 3D displays the area of the enclosed room or the dimensions of it. However, you can change that and add custom writings in the rooms as well. Simply click on the text where the dimensions are and edit it from the “Text Annotations” bar on the right menu.
Making angled walls
No room is the same. Architects know that and you probably have a different idea of what your renovations are going to look like. They may or may not differ from the traditional dimensions that are followed. Be that as it may, it’s always a good idea to have the option to customize and change your house. Live Home 3D provides that with a tonne of different ways you can change how your plan is going to look. One very simple and commonly used tool is arched walls and walls that are at a certain angle to each other.
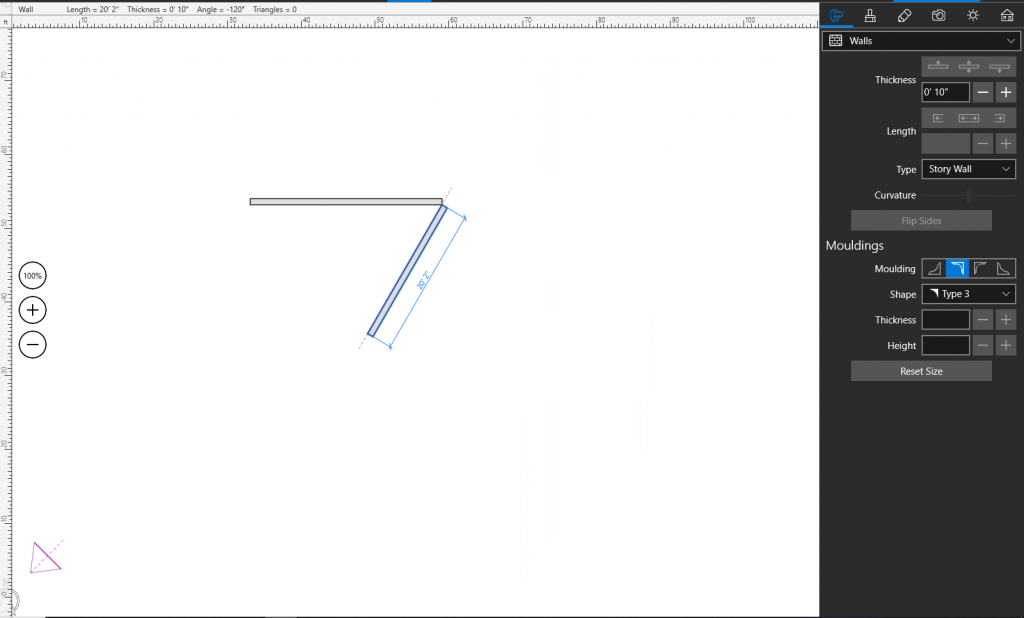
When you want to make an angled wall, select the wall tool from the Building Tools. Clicking once will mark the inception point of the wall. Drag the wall until you have the desired length and then click again. Right where your first wall ends, Live Home 3D will start to put another wall and you can select the angle at which you want it to be placed.
Making arched walls
Making arched walls in Live Home 3D is just as easy as it was making angled walls. From the Building Tools, select arched walls to get things started. When making arched walls, click once for the initial point and then again for the final point. Once you have selected both, Live Home 3D will ask you again to drag the mouse which will change the angle and curvature of the wall.
Live Home 3D makes it incredibly easy to place the right tools and edit the properties however you may like them. Once you have placed the arched wall down, you can change the segmentation and the curvature from the right menu. Increasing and decreasing the segmentation slider determines who refined the curvature of the arched wall will be.
Verdict
Having Live Home 3D installed and using it to design floor plans for yourself or others is a cinch. Live Home 3D does not over complicate things and provides you with all the options you could need while keeping things simple. From making a simple 2D floor plan to designing a house in 3D, there is very little that cannot be achieved by Live Home 3D. With this guide, you should have an understanding on how you can use the tools that this software provides you with and design a floor plan all by yourself. Along with a paid version, you can try out the free trial for as long as you want, however, the free version does have limited functions available.