Google released the public beta of the all-new Android 12 with beta 4.1. Builds before that were mainly focused and targeted towards developers and enthusiasts; not for commercial usage. However, that changed with the announcement of beta 4.1. Even though, as per Google, the Android 12 operating system has reached enough platform stability with Beta 4.1 that it can be used by the general public, the OS is still in beta. This means, no matter what, you are bound to encounter bugs here and there and that’s not something you would want on your main phone that you use for your day-to-day life.
Android 12 comes with an overall improved UI and many more features that make you want to try it out as soon as possible. Pixel phone owners have a great advantage in these scenarios as they are the first ones to get their hands dirty with the new releases and features. If you have installed the Android 12 beta on your phone and wish to roll back to Android 11 for whatever reason it may be, you have come to the right place as we’ll be taking you through the process of downgrading from the Android 12 beta to a stable Android 11 release.
Before we proceed, it is important to note here that downgrading from the Android 12 beta to Android 11 will wipe all of your data. Therefore, if you have any important data stored on your smartphone, now would be a good chance to back it up. Once we have started with the downgrade process, you won’t be able to back up your data and will lose all your files and apps once the downgrade has been completed.
Downgrade Android 12 Public Beta to Android 11
To start, there are actually two possible methods that you can use to downgrade from the Android 12 beta. This, however, depends on how you installed the Android 12 beta initially. If you had the Android 12 beta installed through the Android Beta Program, then downgrading is going to be as easy as installing the beta. On the other hand, if you installed the Android 12 beta on your smartphone using the Android Flash tool or something else, then the process of downgrading is going to be a bit more difficult. Regardless, do not worry as we will be taking you through both methods step-by-step. Just follow through carefully and you should be good to go. With that said, let’s get started.
Opt-out of the Android 12 Beta Program
This is rather the most simple method as downgrading here takes you a couple of clicks. As it turns out, you can only use this method if you actually installed the Android 12 beta by enrolling in the Android 12 Beta Program. In case you didn’t use this method to get the Android 12 beta installed, then it won’t work for you and you should move onto the second method mentioned down below. On the other hand, if you installed the Android 12 beta via the Android Beta Program, you can simply follow the instructions down below to unenroll from the beta and you should be good to go.
- First of all, head to the Android Beta Program website by clicking here.
- On the website, make sure that you are signed in to your Google account that is associated with the phone that has the Android 12 beta installed.
- Once you log in, you will see a list of devices that are compatible with the Android 12 beta along with the devices that you have enrolled into the beta program.
- Locate your device that is running the Android 12 beta and simply click the Opt-out button.
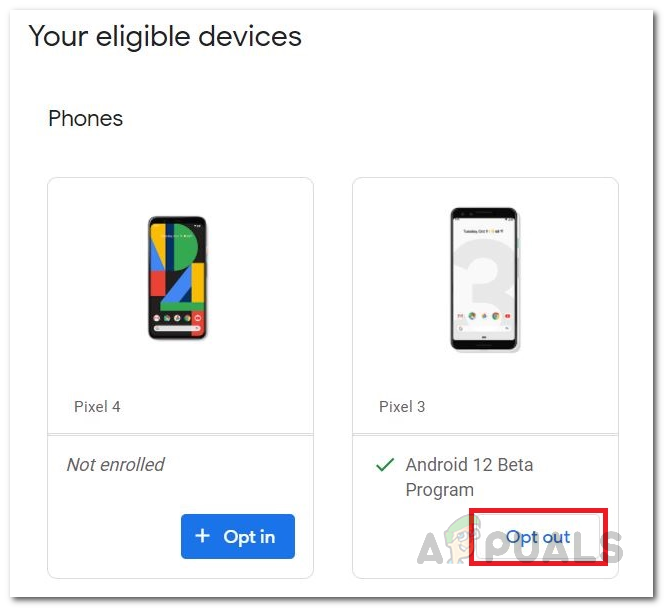
Android 12 Eligible Devices - This will bring up a message that tells you that you are about to unenroll from the beta. Here, simply click the Leave beta button.
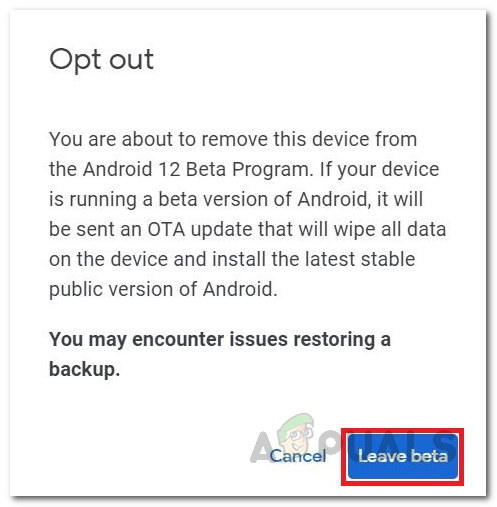
Leaving Android 12 Beta - Once you have done that, your smartphone will receive an Android 11 version over the air. You can simply go to your phone settings and perform a system update. Once it has finished downloading, Android 11 will be installed on your smartphone.
Flash Android 11 Image
This method is fairly harder than the above one and it will take much more time. However, do not fret as we will be taking you through the whole process step-by-step. In this case, we will be flashing an Android 11 factory image on your phone with the help of Android SDK platform tools.
Download Android SDK Platform Tools and Android 11 Factory Image
Before we begin with the downgrade process, some prerequisites need to be dealt with. For this process, we need to download the Android SDK Platform-tools along with an Android 11 factory image. Follow the steps down below to do all of this:
- First of all, head to the official page for the Android SDK Platform-tools by clicking here.
- There, click on the Download SDK Platform-Tools for Windows option. If you are using a Mac, click on the Mac option.
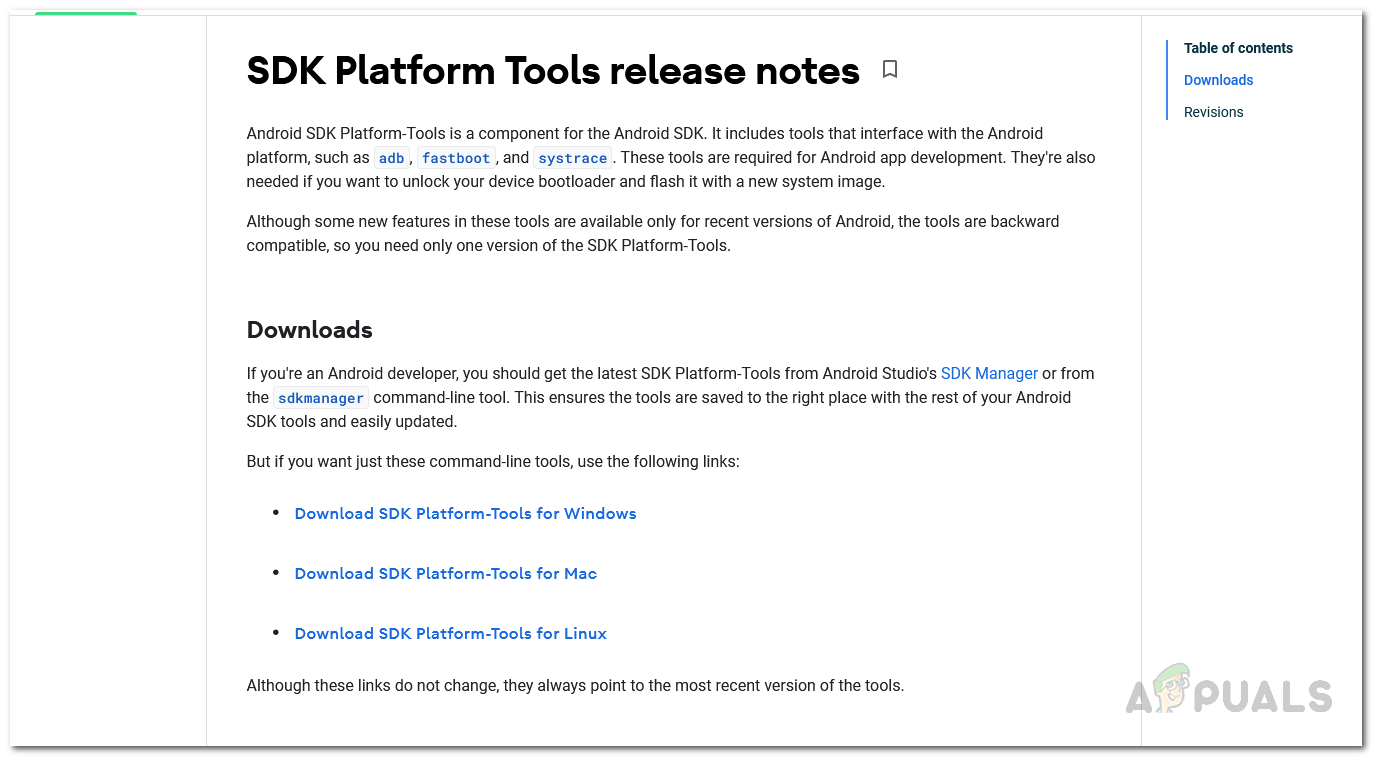
Downloading SDK Platform Tools - Agree to the terms and conditions and then click the Download button to begin the download.
- Once the download has been completed, extract the Platform-tools to the desired location.
- After that, head to the Android Factory images website by clicking here.
- Download the Android 11 factory image for your device from the list provided there.
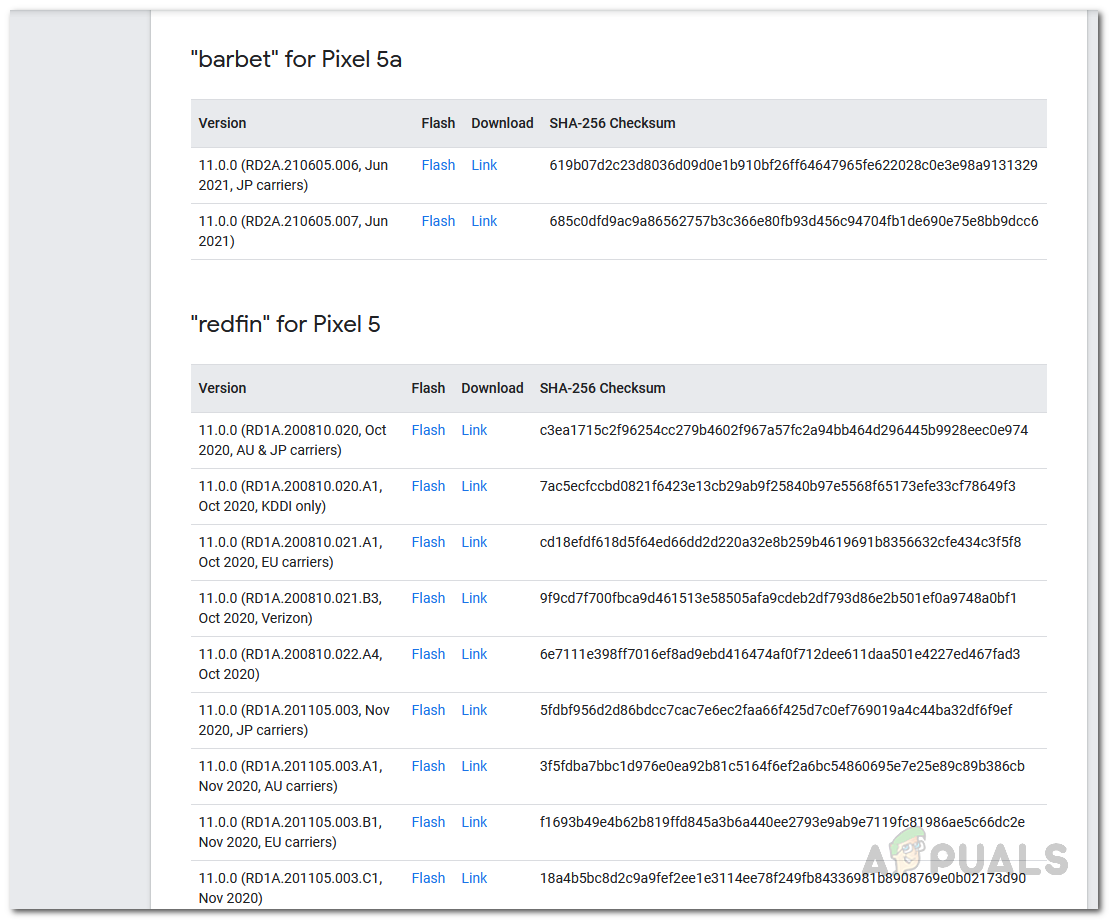
Android Factory Images - Once you have downloaded the image, extract the files to the Platform tool folder.
- Make sure that the factory image files are inside the platform-tools folder.
Enable USB Debugging and OEM Unlocking
Now that we have the required files in the right place for the flash, it is time to enable USB Debugging and OEM Unlocking on your phone via the Developer options menu. To do this, follow the instructions down below:
- First of all, open up the Settings app on your phone.
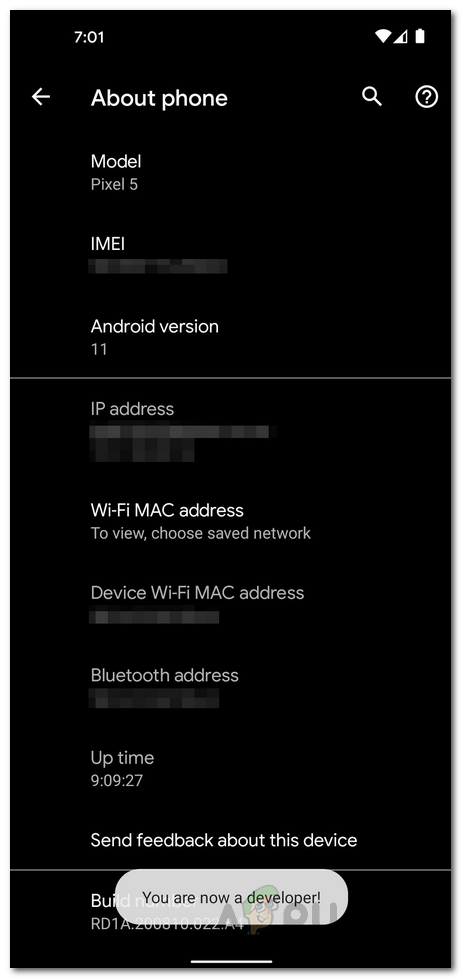
- At the bottom, go to About Phone.

Android Settings - In the About phone menu, tap on the Build Number option 7 times rapidly.
- Once you have done that, you will see a “You are now a developer!” message pop up.
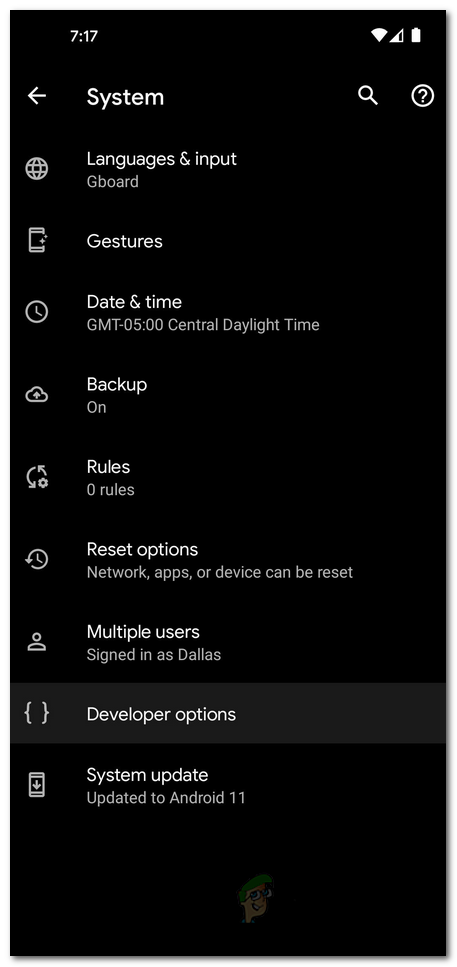
Enabling Developer Mode - After that, go back to the Settings menu, and make your way to System.
- There, go into the Developer options menu.
Android Developer Options - From the Developer options menu, enable USB Debugging and OEM Unlocking.
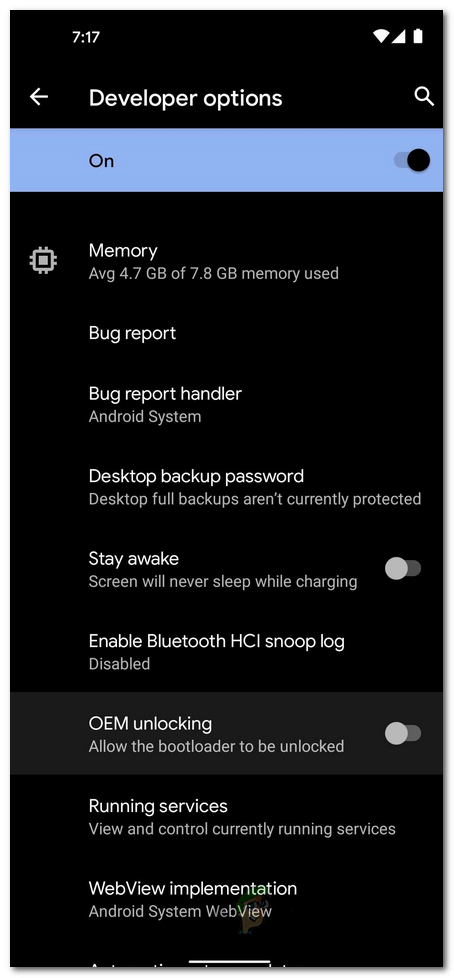
Enabling OEM Unlocking - Tap the Enable option on the pop-up messages that appear.
Unlock Bootloader of your Phone
As it turns out, for you to be able to flash the Android 11 factory image on your phone, you need to have the bootloader unlocked. If your bootloader is already unlocked, you can go ahead and skip this step. In case it isn’t, follow the instructions down below to unlock your bootloader:
- First of all, open up the Platform Tools folder on your computer.
- There, in the address bar, type in cmd and then hit the Enter key.
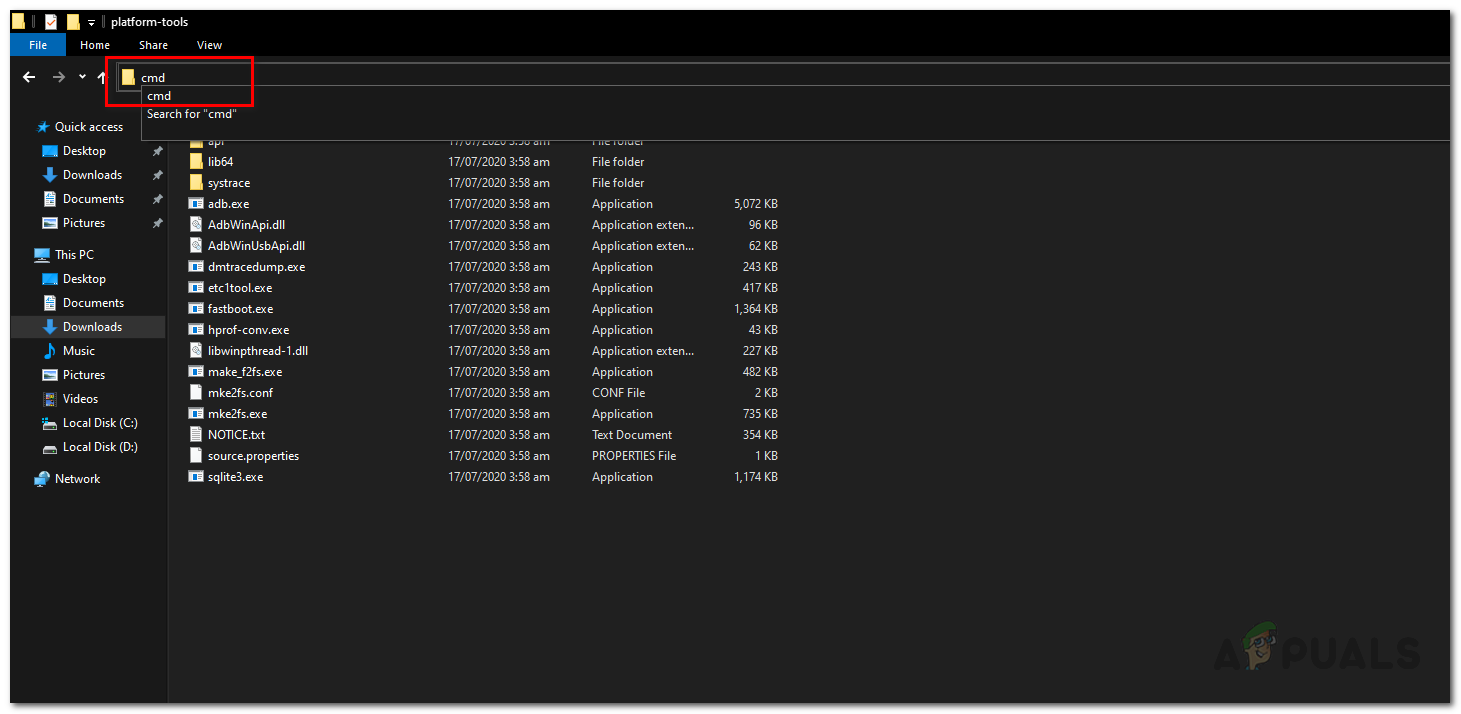
Opening CMD - This will open up a command prompt window in the same directory.
- Before we proceed, make sure that your phone is connected to your computer.
- After you have connected your phone, enter the “adb reboot bootloader” command without the quotes and hit the Enter key. This will boot your phone into the fastboot mode.

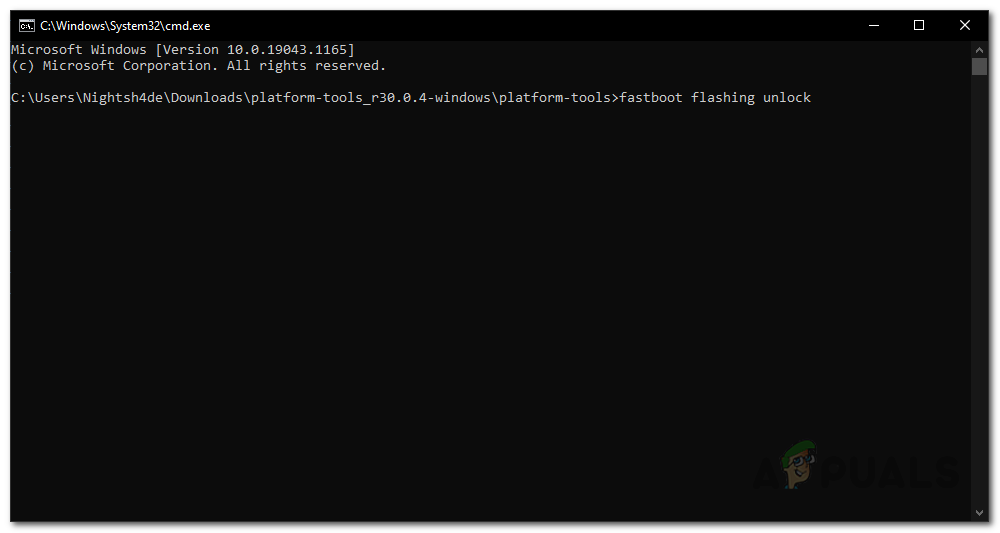
Enabling Fastboot Mode - Once your phone is in fastboot mode, enter the “fastboot flashing unlock” command without the quotes to start the bootloader unlocking process.
Unlocking Bootloader - On your phone, you will be shown a warning message. Ignore it and use the volume keys to navigate through the menu.
- Choose the Unlock the bootloader by navigating to it and then pressing the power button.
- Once you have done that, your bootloader will be unlocked. Make sure that USB Debugging is enabled when the device restarts.
Flash Android 11 Factory Image
At this point, everything is in place and you are ready to flash the Android 11 factory image on your phone. To do this, follow the instructions down below carefully:
- First of all, make sure that your phone is connected to the computer.
- After that, enable the fastboot mode on your phone as shown in the instructions above.
- Once you have enabled fastboot mode on your phone, enter the “flash-all” command without the quotes in the command prompt.

Flashing Android Image - This will start the downgrade process and flash the Android 11 Factory Image to your phone.
- Once the process has been completed, you will be shown a message on the command prompt.
Relock Bootloader
You have successfully downgraded from Android 12 to Android 11 at this point. However, to finish up everything, you need to lock your bootloader. This is really important so don’t skip this step. Follow the below instructions to relock the bootloader:
- First of all, you will have to enable USB Debugging on your phone again since you just flashed an Android 11 factory image.
- Once you have enabled USB Debugging, connect your phone to your computer.
- Then, go to the Platform Tools folder and enter cmd in the address bar to open up a command prompt window.
Opening CMD - Make sure your phone is in Fastboot mode by entering the “adb reboot bootloader” command without the quotes.
Enabling Fastboot Mode - Finally, to lock the bootloader, enter the “fastboot flashing lock” command without the quotes and hit Enter.

Locking Bootloader - On your phone, use the Volume keys to navigate to the “Lock the bootloader” option and then press the Power button to select it.
- This will wipe all the data on your data and then relock the bootloader. Once done, you can restart your device and start using Android 11 to its fullest.